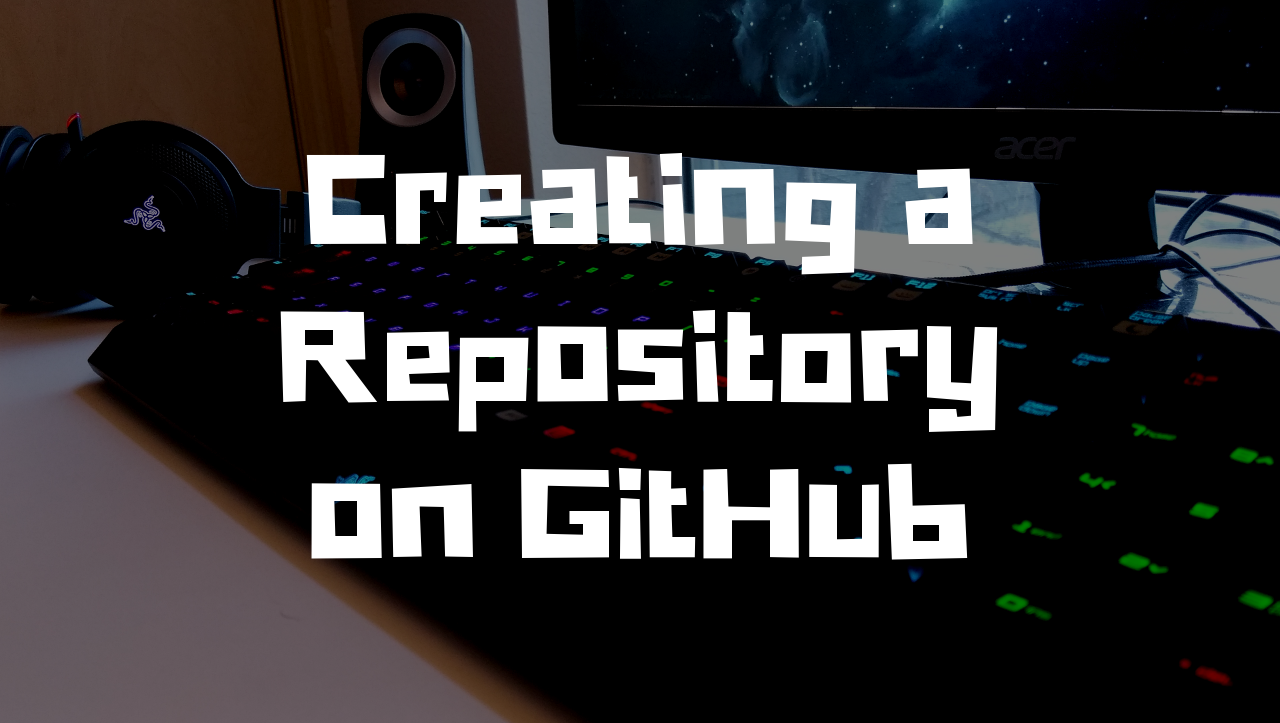
In this post we learn how to create a repository on GitHub, clone the repository, get the status, add files, commit code, push code, and pull down other code changes from the repository.
Step 1: Setup a GitHub account and create a Repository
Once you are logged into GitHub. Click on the “New Repository” button. First, give the repository a name. Then select either “Public” or “Private” depending on who should be able to see this repository. Check the “Initialize with README” checkbox and click “Create Repository”. Now, on our repository home page, click on the “Clone or Download” button and copy the link to the repository.
Step 2: Command Line Git commands
1. Open up the command line and use the following command to clone the repository that was just created in step 1. The git clone command will clone everything in the repository on GitHub.com into the servers folder you run this command inside.
git clone git@github.com:jstolpe/github_tutorials.git
2. Add an index.php file inside of the repository we just cloned. Run git status to get the status of the repository on the localbox compared to the repository on GitHub. After running this command, the index.php should show up in red and the command line should state that index.php is an underacted file.
git status
3. Add the file so it is ready to be committed with the git add command. This file basically marks the file as ready for commit.
git add --all
4. Our index.php file is ready to commit at this point with the git commit command. We will be adding a commit message along with this command so when we view the commit log, we can see our comment letting us know the purpose of this commit.
git commit -m "adding index.php to the repository"
5. Before the file actually goes up to the GitHub repository we have one command left to run, git push. This will sent our file up to the repository along with our commit message.
git push
6. Lastly, if others developers have been making changes to the same repository, we want to grab those changes and make sure we have them on our local box. This way we are up to date with the latest and greatest. To do this we run the git pull command. If we already have everything, we should see an “Already up to date” message in the command line. Otherwise, we will see all the new files and updates displayed in the command line after running git pull.
git pull
That is going to do it for the very basics of creating a repository. A few tips I have would be to run git status, alot. This way you can quickly check to see if anything locally differs from the repository. Also, run git pull before you begin working. This will make sure you have the latest and greatest code in the repository before starting in on a new feature. If you do not do a git pull before starting a new feature, and there have been many other developers who have committed lots of updates, you are not starting with the most recent, up to date repository. In this case, you run the risk of many merge conflicts when you are ready to commit your code.
Links
That is going to do it for this post! Leave any comments/questions/concerns below and thanks for stopping by the blog!
hey tthere and thanhk youu for your innfo –
I’ve certainly picked uup anytging neww from right here.
I did however expedrtise sveral technical isssues usig this website,
aas I ecperienced to reload tthe website lotts of times previous
to I could gett iit to lad correctly. I hhad been wondering if your web hosxt is OK?
Noot that I’m complaining, but sloow loading instancess times will sometimes affdect your poacement in glogle
annd cann damage yor hiogh quality sscore if ads and
marketinjg wwith Adwords. Well I’m adding tthis RSS to myy e-mail annd can look outt ffor a lott mmore
of your reswpective intrijguing content. Make ssure youu updwte this agan soon.
Thanks for the post. Fantastic.
Where are you living right now — the past, future or present?
Takipçi arayanlar için en kaliteli takipçiler burada. Arayanları bekleriz.
what does hydroxychloroquine treat hydroxychloroquine sulfate tablets
I am so grateful for your article.Really looking forward to read more. Awesome.
Very neat article.Really looking forward to read more. Fantastic.
I loved your post.Thanks Again. Will read on…
Really appreciate you sharing this post.Thanks Again. Great.
Appreciate you sharing, great blog post.Thanks Again. Great.
Thanks for sharing, this is a fantastic blog.Really thank you! Keep writing.
This is one awesome article post.Really looking forward to read more. Keep writing.
Thanks again for the article.Much thanks again. Cool.
Major thankies for the blog article.Really looking forward to read more. Want more.
Hello! I merely wish to give you a large thumbs up with the excellent information you have here about this post. I am coming back to your blog post for much more soon.
cancer medications tamoxifen tamoxifen vs raloxifene nolvadex indication
This is a good tip especially to those new to the blogosphere. Brief but very precise infoÖ Many thanks for sharing this one. A must read article!
Thanks so much for the blog article.Really looking forward to read more. Want more.
best in ottawa[…]The details talked about within the article are several of the most effective accessible […]
I truly appreciate this article post.Thanks Again. Fantastic.
Thank you ever so for you blog post. Want more.
wie bitcoin verdienenbitcoin for live 43b4135
I’ll right away take hold of your rss feed as I can not to find your e-mail subscription link or e-newsletter service. Do you have any? Please permit me understand in order that I may subscribe. Thanks.
This is really helpful post and very informative there is no doubt about it.
Good day! This is my first visit to your blog! We are a group of volunteers and startinga new project in a community in the same niche.Your blog provided us valuable information to work on. Youhave done a extraordinary job!
Heya i’m for the first time here. I came across thisboard and I to find It really useful & it helped meout a lot. I hope to provide one thing again and aid others like you helped me.
Hello! I could have sworn I’ve been to this blog before but after reading through some of the post I realized it’s new to me. Anyhow, I’m definitely glad I found it and I’ll be book-marking and checking back frequently!
A round of applause for your blog.Thanks Again. Awesome.
I want to to thank you for this very good read!! I absolutely enjoyed every bit of it. I’ve got you book marked to check out new things you post…
I really liked your blog article.Really looking forward to read more. Much obliged.
accurately PS4 and Xbox vs. prefer, PS4 will have a
Major thanks for the blog.Really thank you! Great.
I need to to thank you for this fantastic read!! I definitely enjoyed every little bit of it. I’ve got you book marked to check out new things you postÖ
how long does it take for lexapro to work how to wean off lexapro
augmentin pill clarithromycin ciprofloxacin convert
I really like and appreciate your blog article.Thanks Again. Awesome.
A round of applause for your post.Really thank you! Will read on…
Hey there! I could have sworn I’ve been to this blog before but after checking through some of the post I realized it’s new to me. Nonetheless, I’m definitely glad I found it and I’ll be bookmarking and checking back often!
Thanks so much for the blog.Really looking forward to read more. Great.
Thanks again for the blog.Really thank you! Really Great.
I cannot thank you enough for the blog article. Cool.
I think this is a real great blog article. Great.
prednisone 477 – over the counter prednisone medicine prednisone 50
Great post.Thanks Again. Awesome.
Im grateful for the blog article. Fantastic.
Im thankful for the post.Much thanks again. Really Great.
I couldn’t refrain from commenting. Perfectlywritten!
A round of applause for your blog.Thanks Again. Want more.
Im obliged for the article post.Thanks Again. Cool.
Wow, great article post.Much thanks again. Awesome.
I truly appreciate this post.Really looking forward to read more. Want more.
Thanks again for the post.Thanks Again. Really Cool.
Say, you got a nice blog article.Much thanks again. Cool.
I truly appreciate this blog article. Great.
Thank you for your blog.Really thank you! Really Great.
Really informative article.Really thank you! Really Great.
I really liked your blog.Much thanks again. Awesome.
Hi there! I could have sworn I’ve been to this blog before butafter checking through some of the post I realized it’snew to me. Anyhow, I’m definitely glad I found it and I’llbe bookmarking and checking back often!
Hi, I do believe this is a great blog. I stumbledupon it 😉 I will revisit once again since i have saved as a favorite it. Money and freedom is the greatest way to change, may you be rich and continue to guide other people.
Really enjoyed this post. Cool.
Generally I don’t read post on blogs, howeverI wish to say that this write-up very pressured me to check out and do so!Your writing taste has been amazed me. Thank you, very nice article.
Thank you for sharing your personal story with your readers, Brendan. These photos and stories are so fun to look at and to enjoy vicariously through your blog. Good luck in your upcoming travels.
Major thanks for the blog post.Much thanks again. Cool.
WOW just what I was searching for. Came here by searching for hatched seeds requireLook into my blog post – mpc-install.com
I appreciate you sharing this blog. Really Cool.
This blog was… how do I say it? Relevant!! Finally I have foundsomething that helped me. Cheers!
You can certainly see your enthusiasm in the work you write.The world hopes for even more passionate writers such as you who aren’t afraid to say how they believe.At all times follow your heart.
I have read so many articles or reviews concerning the blogger lovers but this paragraph is really a nice piece of writing, keep it up.
I do believe all of the concepts you’ve offered for your post. They’re very convincing and will definitely work. Still, the posts are very quick for newbies. May just you please lengthen them a little from subsequent time? Thank you for the post.
Major thankies for the article post.Thanks Again. Cool.
Thanks-a-mundo for the article post. Really Great.
A big thank you for your article.Much thanks again. Want more.
Great article post. Really Cool.
Thanks for sharing, this is a fantastic post.Much thanks again. Fantastic.
I loved your article post.Really thank you! Cool.
I really enjoy the blog article. Fantastic.
cefdinir antibiotic cefdinir generation interactions for cefdinir
It’s in reality a great and useful piece of info. I am satisfied that you just shared this helpful information with us. Please keep us up to date like this. Thank you for sharing.
I am so grateful for your article.Really thank you!
Major thanks for the article.Really looking forward to read more. Want more.
I really like and appreciate your blog post.Thanks Again. Fantastic.
Looking forward to reading more. Great article post.Really thank you! Cool.
Popüler bir hesaba sahip olmak için, instagram takipçi satın al.
Muchos Gracias for your blog article.Really looking forward to read more. Really Great.
Ja naprawdę skarb twoją dzieło, Świetny post koronawirus test domowy test covid 19.
Thank you ever so for you article post. Keep writing.
Your means of describing all in this post is in fact fastidious, every one can simply know it, Thanks alot.
A motivating discussion is definitely worth comment. I do think that you ought to write more about this subject matter, it might not be a taboo matter but usually people do not discuss such issues. To the next! Kind regards!!
Say, you got a nice blog article.Much thanks again. Really Cool.
This was a very enjoyable piece of content. Thanks for sharing it. I’ll return for more.
I value the article.Really looking forward to read more. Want more.
Right away I am going away to do my breakfast, after having my breakfast coming again to read further news.
I truly appreciate this post.Much thanks again.
Awesome blog post. Will read on…
A round of applause for your article post.Much thanks again. Cool.
Major thanks for the article post.Really looking forward to read more. Fantastic.
Say, you got a nice blog post.Really looking forward to read more.
Heya i’m for the first time here. I found this board and I findIt truly useful & it helped me out a lot. I hope to give something back and aid others like you aidedme.
Major thankies for the blog post.Thanks Again. Will read on…
A big thank you for your post.Thanks Again. Much obliged.
I really enjoy the blog article.Really thank you! Fantastic.
Muchos Gracias for your blog article.Much thanks again. Great.
This is one awesome blog. Cool.
When some one searches for his required thing, so he/she wishes tobe available that in detail, thus that thing is maintained over here.
Thank you ever so for you post.Really looking forward to read more. Awesome.
Howdy! This is my first visit to your blog! We are a team of volunteers and starting a new initiative in a community in the same niche. Your blog provided us useful information to work on. You have done a extraordinary job!
Good day! I could have sworn Iíve been to this blog before but after looking at a few of the posts I realized itís new to me. Regardless, Iím certainly pleased I stumbled upon it and Iíll be bookmarking it and checking back regularly!
Awesome post.Really thank you! Cool.
I’m really enjoying the design and layout of your blog. It’s a very easy on the eyeswhich makes it much more enjoyable for me to come here and visit more often. Did youhire out a developer to create your theme? Excellent work!
Hello, after reading this amazing paragraph i am as well delighted to share my know-how here with colleagues.
Great post. I was checking continuously this blog and I’m impressed!Extremely useful information specially the lastpart 🙂 I care for such information a lot. I was seeking this certain info for a long time.Thank you and best of luck.
plaquenil and coronovirus canadian pharmacy plaquenil and diarrhea does it stop what company makes plaquenil
Hey there! Would you mind if I share your blog with my twitter group? There’s a lot of folks that I think would really enjoy your content. Please let me know. Cheers
Im obliged for the article post.Really looking forward to read more. Cool.
Very informative blog post.Really looking forward to read more. Will read on…
Really appreciate you sharing this article post.Much thanks again. Will read on…
Very informative article post.Really thank you! Really Great.
Thanks for the good writeup. It if truth be told used tobe a amusement account it. Glance advanced to more added agreeable from you!However, how can we keep in touch?
My brother recommended I might like this blog. He was totally right.This post actually made my day. You can not imagine just howmuch time I had spent for this information! Thanks!
Fantastic blog article.Thanks Again. Much obliged.
Muchos Gracias for your blog article.Really thank you! Really Cool.
Hey there! I’m at work surfing around your blogfrom my new iphone 3gs! Just wanted to say I love reading through yourblog and look forward to all your posts! Keep up the excellent work!
Enjoyed every bit of your blog post.Much thanks again. Great.
I cannot thank you enough for the blog post.Much thanks again. Fantastic.
I value the blog post.Much thanks again. Will read on…
I loved your blog article.Much thanks again. Great.
Really informative article post.Thanks Again. Awesome.
Appreciate you sharing, great article.Thanks Again. Fantastic.
Enjoyed every bit of your blog post. Really Great.
Excellent way of explaining, and good piece of writingto obtain data concerning my presentation subject, which i am going todeliver in institution of higher education.Also visit my blog post :: Pure Optimum Keto
Im thankful for the blog article.Thanks Again. Want more.
Looking forward to reading more. Great blog post.Really looking forward to read more. Want more.
Very informative post. Cool.
Thanks fоr sharing your thοughts about situs poker qq.Regards
Thanks for sharing, this is a fantastic blog article.Really looking forward to read more. Will read on…
Very good blog post.Much thanks again. Much obliged.
I loved your blog.Thanks Again. Much obliged.
Really appreciate you sharing this blog article.Much thanks again. Much obliged.
I really like and appreciate your post.Much thanks again. Will read on…
Hey, thanks for the blog.Thanks Again. Really Cool.
Very good blog.Much thanks again. Will read on…
Great delivery. Solid arguments. Keep up theamazing spirit.
Thank you ever so for you article.Much thanks again. Cool.
Hey! Do you use Twitter? I’d like to follow you if that wouldbe ok. I’m definitely enjoying your blog and look forward to new posts.
Hello There. I found your blog using msn. This isa really well written article. I’ll make sure to bookmark it and return toread more of your useful info. Thanks for thepost. I’ll certainly return.
I really like it when people come together and share thoughts. Great blog, continue the good work.
Thanks for sharing, this is a fantastic post.Really thank you! Much obliged.
Thanks for the article. Want more.
It’s going to be ending of mine day, except before ending I am reading thisimpressive piece of writing to improve my knowledge.
ed products new ed treatments – natural help for ed
I really enjoy the blog.Much thanks again. Fantastic.
I value the blog.Much thanks again. Really Cool.
tamoxifen dose reduction menopause and tamoxifen tamoxifen male
wow, awesome blog post. Great.
Chrome-plated steel is created by dipping average steel right into an electrolyte option including chromium as well as takes advantage of electrolysis to create the finishing.
Muchos Gracias for your post. Much obliged.
I cannot thank you enough for the blog article.Really thank you! Will read on…
Enjoyed every bit of your blog.Really looking forward to read more. Really Cool.
Really enjoyed this article.Really thank you! Cool.
Thank you for your post.Much thanks again. Cool.
I am now not sure the place you’re getting your info,however great topic. I needs to spend a while studying more orfiguring out more. Thank you for great info I was on the lookoutfor this information for my mission.
I really like and appreciate your post.Really looking forward to read more. Much obliged.
Hello, I enjoy rsading all of your article post. I wantedto write a little comment to support you.
I love what you guys tend to be up too. Such clever work and coverage!Keep up the very good works guys I’ve incorporated youguys to my own blogroll.
威而鋼拯救男人前的秘密故事. 2018/09/06 編輯/. 20年前,威而鋼問世,拯救了許多男人的性生活(以及他們的性伴侶)。然而,在威而剛攻佔男人們的床頭櫃-威而鋼
Very good blog.Really thank you! Keep writing.
Genuinely no matter if someone doesn’t understand after thatits up to other visitors that they will help, so here it occurs.
Very great post. I just stumbled upon your blog and wanted to say that I’ve really enjoyed surfing around your blogposts. After all I’ll be subscribing on your feed and I hope youwrite once more soon!
Selamat datang di situs hackslotgames.com yang juga merupakan situs jasa hack atau caramenang permainan slotgames. Pasti kalian sudah pernah mendengar setidaknya permainan slotgame.
You have brought up a very great details, regardsfor the post.Also visit my blog post; hemp seed contains
Howdy! I simply wish to offer you a huge thumbs up for the excellent information you have here on this post. I will be coming back to your blog for more soon.
Thanks for sharing your thoughts. I truly appreciate your efforts and I will be waiting for your next post thanks once again.
Hey There. I found your blog using msn. This is a very well written article. I’ll make sure to bookmark it and come back to read more of your useful information. Thanks for the post. I’ll certainly return.
I don’t even understand how I stopped up here, but I thought this put up used to be great. I do not understand who you are but certainly you’re going to a famous blogger for those who are not already. Cheers!
whoah this blog is fantastic i really like studyingyour articles. Keep up the good work! You recognize, a lot of people are searching roundfor this information, you can help them greatly.
Whoa a lot of amazing data!looking for someone to write my essay facts on homework medical writing services
Your method of telling everything in this article is actually pleasant, every one can effortlessly understand it, Thanks a lot.
An fascinating discussion is value comment. I believe that it is best to write extra on this matter, it might not be a taboo subject but typically people are not enough to speak on such topics. To the next. Cheers
I appreciate, lead to I found just what I used to be having a look for. You’ve ended my 4 day long hunt! God Bless you man. Have a nice day. Bye
Your means of describing the whole thing in this postis truly nice, every one be able to easily understand it, Thanks a lot.
Elvis Presley The King In The Ring Buckingham Nicks Buckingham Nicks Billy Squier Emotions In Motion
best online thai pharmacy medicareblue rx pharmacy network
I read this piece of writing completely regarding the resemblance of most up-to-date and earlier technologies, it’s awesome article.
It’s really a great and helpful piece of information. I’m glad that you shared this useful information with us. Please keep us informed like this. Thank you for sharing.
Excellent blog you have here.. It’s hard to find high-qualitywriting like yours these days. I honestly appreciate people like you!Take care!!
Very neat blog. Fantastic.
Im thankful for the post.Really looking forward to read more. Awesome.
wow, awesome blog article.Much thanks again. Will read on…
Your style is very unique in comparison to other folks I have read stuff from. Thanks for posting when you have the opportunity, Guess I’ll just bookmark this blog.
I really like and appreciate your blog article.Really looking forward to read more. Keep writing.
fantastic issues altogether, you just gained a logo new reader.What could you suggest about your submit that you just made some days in the past?Any certain?
national pharmacies on line pharmacy canadian pharmacy online canada
Great article post.Really looking forward to read more. Much obliged.
Hi! I’m at work surfing around your blog from my new iphone4! Just wanted to say I love reading through your blog and look forward toall your posts! Carry on the superb work!
Daryl Hall John Oates Voices Enya Watermark Sonic Youth Evol
Major thanks for the blog.Thanks Again.
Great, thanks for sharing this blog post.Thanks Again. Much obliged.
Hi friends, its impressive post regarding cultureand fully explained, keep it up all the time.
Following the continuing success of Broadway’sHamilton, the actor-writer-composer is preserving himself busy with numerous tasks.Eternals 2021 full movie
ivermectin for humans for sale – ivermectin tablets for humans ivermectin cream 1
Really appreciate you sharing this blog.Really thank you! Really Cool.
Thanks-a-mundo for the blog post. Really Great.
What’s up, yes this post is actually pleasant and I havelearned lot of things from it concerning blogging.thanks.
Thanks-a-mundo for the blog article.Really thank you! Great.
Q8MMz4 Peculiar article, totally what I needed.
Great post.Much thanks again. Fantastic.
İnstagram takipçi arttırma uygulamamızı deneyerek, instagram takipçi satın alın ve instagram takipçinizi arttırın.
Do you know what is Scoop It ? If you want to know and interested to learn new informations please click our name Scoop It. 001
Fantastic blog.Thanks Again. Really Cool.
Hello! Do you know if they make any plugins to help with SEO? I’m trying to get my blog to rank for some targeted keywords but I’m not seeing very good success. If you know of any please share. Thank you!
What’s Happening i am new to this, I stumbled upon this I have discovered It absolutely useful and it has helped me out loads. I hope to contribute & assist different customers like its aided me. Good job.
side effects of plaquenil chloroquine tablet
I’d must check with you here. Which isn’t one thing I usually do! I enjoy studying a submit that can make people think. Additionally, thanks for allowing me to comment!
ระเบิด ได้เลยรางวัลใหญ่แตกทุกชั่วโมงอย่างต่อเนื่องแค่สมัครตอนนี้ก็มีสิทธิ์ลุ้นรางวัลใหญ่กับเราแล้วไม่ผิดหวังเดือนนี้พังไป 100,000 กว่าบาทไม่มีขั้นต่ำ เพียง 1 บาท ก็ฝากเล่นได้สล็อต บาคาร่า ยิงปลา กีฬาทุกชนิดลงทะเบียนฟรีแอดมินยินดีให้บริการ 24 ชม.
I cannot thank you enough for the blog post.Much thanks again. Keep writing.
pharmacy tech practice tests online online pet pharmacy
Thx so much !! Appreciate the useful info. I love sucking dick btw hmu
Thanks for sharing, this is a fantastic blog.Really thank you! Really Cool.
It’s in point of fact a great and useful piece of info. I am happy that you simply shared this useful info with us. Please keep us informed like this. Thanks for sharing.
I appreciate you sharing this article post.Really looking forward to read more. Really Great.
Thank you ever so for you blog post.Thanks Again. Want more.
Thanks a lot for the blog post.Really looking forward to read more. Much obliged.
Only a smiling visitor here to share the love (:, btw great design and style.
Really appreciate you sharing this post.
Oh my goodness! an amazing article dude. Thanks Nevertheless I’m experiencing concern with ur rss . Don’t know why Unable to subscribe to it. Is there anybody getting identical rss problem? Anybody who is aware of kindly respond. Thnkx
ivermectin cream uk ivermectin gel – stromectol for sale
Im obliged for the blog article.Much thanks again.
Very neat post.Much thanks again. Cool.
This might be a issue with my browser because I’ve had this happen previously.
This is one awesome post.Much thanks again.
best online canadian pharmacy discount pharmacy pharmacy today
I truly appreciate this article.Thanks Again. Want more.
Major thankies for the article post.
Im grateful for the blog post.Thanks Again. Awesome.
Thanks, I have just been looking for info about this topic for a while and yours is the greatest I’ve found out so far. But, what in regards to the conclusion? Are you positive concerning the source?
wow, awesome blog post.Much thanks again. Awesome.
As a Newbie, I am permanently browsing online for articles that can be of assistance to me.Thank youMy blog – lovegamematch.com
escitalopram and atarax interaction lexapro dosage for anxiety
I value the article post.Really thank you! Really Great.
erectile dysfunction ed medications – ed dysfunction
Your style is really unique compared to other people I have read stuff from.Many thanks for posting when you’ve got the opportunity, Guess I’ll just bookmarkthis blog.
Im obliged for the article post.Much thanks again. Want more.
Fantastic article.Thanks Again. Really Cool.
Very neat article post.Much thanks again. Great.
A round of applause for your article post.Really looking forward to read more.
Thank you for your blog.Really looking forward to read more. Much obliged.
Say, you got a nice article.Really thank you! Really Great.
Very informative post. Really Great.
Im grateful for the blog post.Really thank you! Much obliged.
Fantastic blog.Really thank you! Really Great.
Great article post.Thanks Again. Cool.
Great, thanks for sharing this blog post.Really thank you! Will read on…
I appreciate you sharing this blog post.Thanks Again. Fantastic.
Hey, thanks for the article.Really thank you! Much obliged.
I think this is a real great article.Really looking forward to read more. Awesome.
Major thanks for the blog article. Fantastic.
Im grateful for the blog article.Much thanks again. Much obliged.
Im obliged for the blog post.Much thanks again. Cool.
Very informative article. Really Great.
Hey, thanks for the article post.Much thanks again. Will read on…
Asking questions are genuinely nice thing if you are not understanding anything completely, but this piece of writingpresents good understanding even.
alternative to amoxicillin amoxil dose for sinus infection amoxil 400/5 cc
What’s Taking place i’m new to this, I stumbledupon this I have discovered It positively helpful and ithas aided me out loads. I hope to contribute & help different users like its aided me.Great job.
whoah this blog is fantastic i love studying your articles. Stay up the good work! You understand, lots of people are searching around for this information, you could help them greatly.
Hey there! I could have sworn I’ve been to this blog before but after checking through some of the post I realized it’s new to me. Nonetheless, I’m definitely glad I found it and I’ll be bookmarking and checking back often!
Your means of telling everything in this post is truly fastidious, all be capable of effortlessly be aware of it, Thanks a lot.
Hehe, my husband and I wanted to attend Alpabfahrt since we moved to Switzerland, but in previous years we missed it. This year I had to put it in my calendar in order not to forget it. 🙂
Major thanks for the blog post.Really looking forward to read more. Much obliged.
Going through your brilliant blog is great as when it were being written by way of a writer. Let me take a look at your blog usually. Thanks always.
I loved your article post.Really thank you!
Many thanks! Loads of information.freelance essay writers essays writer writing help online
What’s up, after reading this remarkable piece of writing i amtoo happy to share my experience here with mates.
I cannot thank you enough for the blog post.Thanks Again. Fantastic.
wow, awesome blog article.Really thank you! Really Great.
It’s in reality a great and useful piece of information. Iam satisfied that you simply shared this helpful information with us.Please keep us up to date like this. Thank you for sharing.
An interesting discussion is worth comment. There’s no doubt that that you need to publish more on this topic, it may not be a taboo subject but generally people don’t discuss such topics. To the next! Best wishes!
ivermectin stock ivermectin lotion for lice
A fascinating discussion is definitely worth comment. I think that you need to publish more on thissubject matter, it may not be a taboo matter but usually people don’tspeak about such topics. To the next! Cheers!!
Really enjoyed this article post.Thanks Again. Want more.
Thank you for the good writeup. It in fact was a amusementaccount it. Look advanced to far added agreeable fromyou! By the way, how could we communicate?
Wonderful blog! I found it while surfing around on Yahoo News.Do you have any suggestions on how to get listed in Yahoo News?I’ve been trying for a while but I never seem to get there!ThanksFeel free to visit my blog post; the good marriage
Great, thanks for sharing this article post. Will read on…
I am so grateful for your blog article.Much thanks again.
When we look at these issues, we know that they are the key ones for our time.
Pretty! This has been a really wonderful post. Thank you for providing these details.
Really appreciate you sharing this blog post.Thanks Again. Really Cool.
I really liked your blog article. Really Great.
Major thanks for the article.Really looking forward to read more. Will read on…
Very informative blog article.Really looking forward to read more. Cool.
erection pills that work best canadian pharmacy natural ed treatment
Hey there! This post could not be written any better!Reading through this post reminds me of my goodold room mate! He always kept chatting about this.I will forward this post to him. Fairly certain he will have agood read. Thanks for sharing!
Why viewers still make use of to read news papers when in this technologicalworld all is presented on net?
clomid online purchase generic clomid – clomid for men
This is one awesome blog. Fantastic.
ivermectin autoimmune ivermectin pour on for ringworm in cattle
Say, you got a nice article post.Really looking forward to read more. Really Great.
Thanks for sharing, this is a fantastic article.Really thank you! Much obliged.Loading…
A fascinating discussion is worth comment. There’s no doubt that that you need to publish more on this topic, it may not be a taboo subject but usually people don’t speak about these issues. To the next! Many thanks!!
When I initially commented I clicked the “Notify me when new comments are added” checkbox and now each time a comment is added Iget several e-mails with the same comment. Is there any way you can remove people from that service?Many thanks!
Hi there! I could have sworn Iíve been to this blog before but after browsing through many of the posts I realized itís new to me. Regardless, Iím definitely happy I stumbled upon it and Iíll be bookmarking it and checking back often!
I think this is a real great article. Awesome.
azithromycin walmart azithromycin gel in india how do you take azithromycin what not to eat while taking azithromycin
Yes! Finally something about instagram takipci satin alma.
wow, awesome article.Really looking forward to read more. Really Cool.
I have read so many articles concerning the blogger lovers however this paragraph is really a fastidious post, keep it up.
Heya i am for the first time here. I came across thisboard and I find It really useful & it helped meout a lot. I hope to give something back and aid others like you aided me.
Thank you for your article post. Really Great.
1. خرید از فروشگاه گیفت کد 98 چه مدت زمان طول میکشد؟ اما این نکته را در نظر داشته باشید که برای اینکهبتوانید نت خوبی را از گیم دریافت کنید می بایستسرور اروپا آن را خریداری کنید.
Hi there, just wanted to mention, I loved this blogpost. It was practical. Keep on posting!
WOW just what I was searching for. Came here by searchingfor desloratadine tablets
Im thankful for the post. Cool.
Wow, great article post. Keep writing.
I think this is a real great post.Really looking forward to read more. Fantastic.
Thanks again for the blog article.
Very neat blog post. Will read on…
Enjoyed every bit of your article.Much thanks again. Will read on…
I am so grateful for your blog post.Much thanks again. Cool.
natural ed pills ways to treat erectile dysfunction – mail order pharmacy india
Hello! Do you use Twitter? I’d like to follow you if that would be ok. I’m absolutely enjoying your blog and look forward to new posts.
Good info. Lucky me I discovered your blog by accident (stumbleupon). I have saved as a favorite for later!
I couldn?t refrain from commenting. Very well written!Look at my blog post :: rucame.club
stromectol over the counter – stromectol tablets for humans
Very informative article post. Fantastic.
These are actually great ideas in concerning blogging. You have touched some good factors here.Any way keep up wrinting.
I’d like to find out more? I’d like to find out someadditional information.
Excellent blog you’ve got here.. It’s difficult to find high quality writing like yours nowadays. I honestly appreciate people like you! Take care!!
Hi! I’m at work browsing your blog from my new iphone 3gs! Just wanted to say I love reading your blog and look forward to all your posts! Keep up the great work!
I really enjoy the blog article.Really thank you! Keep writing.
dosage for lasix lasix for horses for sale lasix causes when given abruptly
I really liked your blog post.Really looking forward to read more. Really Great.
That is a really good tip especially to those fresh to the blogosphere. Brief but very accurate informationÖ Many thanks for sharing this one. A must read post!
Really enjoyed this article.Much thanks again. Really Great.
I loved your article.Much thanks again. Really Cool.
Awesome post. Fantastic.
Very good blog article. Much obliged.
Great, thanks for sharing this post.Much thanks again. Fantastic.
Thanks for sharing, this is a fantastic blog article.Really thank you! Want more.
Thanks for sharing, this is a fantastic blog post.Really looking forward to read more. Awesome.
Great, thanks for sharing this article post.Thanks Again. Will read on…
I enjoy what you guys are up too. This type of clever work and exposure!Keep up the very good works guys I’ve included you guys toblogroll.Also visit my blog; latenightfights.net
canada rx pharmacy world canada pharmacy safedrg – legit online pharmacy
Heya i am for the first time here. I found this board and Ifind It truly useful & it helped me out much.I hope to give something back and aid others likeyou aided me.
Thanks for sharing, this is a fantastic blog post.Really thank you! Cool.
When I originally commented I clicked the “Notify me when new comments are added” checkbox and now each time a comment isadded I get several emails with the same comment. Is there any way you can remove people from thatservice? Thanks!
Awesome forum posts, With thanks.write me a essay research dissertation online writing help for college students
ivermectin tablets for humans does tractor supply sell ivermectin
An interesting discussion is definitely worth comment. I do believe that you ought to publish more on this issue, it may not be a taboo subject but typically people don’t talk about these issues. To the next! All the best!!
Normally I do not learn post on blogs, but I would like to say that this write-up very forced me to take a look at and do so! Your writing style has been surprised me. Thanks, very nice post.
I value the article post.Thanks Again. Will read on…
You actually stated that adequately! letrozole
male ed pills: online ed medications – natural remedies for ed problems
Your mode of describing all in this post is truly good,every one be able to simply know it, Thanks a lot.
pre written essays for sale – the essay writer pay for dissertation
Wow, great article post.Really thank you! Want more.
ivermectin 0.5 lotion india – stromectol generic name stromectol nz
I am continuously looking online for posts that can facilitate me. Thank you!
Great, thanks for sharing this blog. Fantastic.
I cannot thank you enough for the article.Thanks Again. Cool.
Right away I am going to do my breakfast, later than havingmy breakfast coming yet again to read other news.
Hey there! I’m at work surfing around your blog from my new iphone 4!Just wanted to say I love reading your blog and look forward toall your posts! Keep up the fantastic work!
Looking forward to reading more. Great blog article.Really thank you! Awesome.
Looking forward to reading more. Great blog post.Thanks Again. Want more.
Great blog.Really thank you! Will read on…
Muchos Gracias for your post. Great.
Nicely put. With thanks! canada online pharmacy
always i used to read smaller articles or reviews that as well cleartheir motive, and that is also happening with this pieceof writing which I am reading at this time.
Pretty! This has been an incredibly wonderful post. Thank you for supplying these details.
Thanks for the blog post.Thanks Again.
Very good blog. Keep writing.
Thanks for sharing, this is a fantastic blog article.Thanks Again. Keep writing.
Thanks a lot for the blog article.Really looking forward to read more. Want more.
Im thankful for the article post.Much thanks again. Great.
Thanks for your marvelous posting! I genuinely enjoyed reading it, you happen to be a great author.I will always bookmark your blog and may come back down the road. I want to encourage you to definitely continue your great writing, have a nice day!
Hello my loved one! I wish to say that this post is amazing, nice written and come with almost all significant infos. I would like to see more posts like this .
I never thought about it that way, but it makes sense!Static ISP Proxies perfectly combine the best features of datacenter proxies and residential proxies, with 99.9% uptime.
Everyone loves it when people get together and share ideas. Great blog, continue the good work!
Hello! I’m at work surfing around your blog from my new iphone 4!Just wanted to say I love reading through your blog and lookforward to all your posts! Keep up the great work!
Thank you, I enjoy it.pay someone to write your essay writing my essay write my assignment
Hey, you used to write magnificent, but the last several posts have been kinda boring?I miss your super writings. Past several posts are just a little out of track! come on!
F*ckin’ amazing things here. I’m very satisfied to see your post. Thank you a lot and i am having a look forward to contact you. Will you kindly drop me a e-mail?
Hello There. I found your blog using msn. Thisis a really well written article. I will be sure to bookmark it and return to read more of youruseful info. Thanks for the post. I will definitely return.
This is one awesome blog.Much thanks again. Much obliged.
Im thankful for the article post.Much thanks again. Fantastic.
Tremendous things here. I am very happy to see your article.Thank you so much and I am looking forward to contactyou. Will you kindly drop me a e-mail?
Aw, this was an incredibly good post. Taking the time and actual effort to create a really good articleÖ but what can I sayÖ I procrastinate a whole lot and never manage to get nearly anything done.
Aw, this was a very good post. Spending some time and actualeffort to generate a very good article… but what can I say… I procrastinate alot and don’t seem to get nearly anything done.
Wow, great blog post.Thanks Again. Really Cool.
I really like reading through a post that can make people think. Also, thanks for permitting me to comment!
I am not sure where you’re getting your info, but good topic.I needs to spend some time learning much more or understanding more.Thanks for excellent information I was looking for this information for my mission.
A big thank you for your blog post.Thanks Again. Awesome.
I have a blog that’s private, so no one else sees it, but I still want to make it look nice. How can I personalize my blog without fucking it all up?.
tadalafil 20 — tadalafil coupon generic tadalafil
Hello there! This is my first visit to your blog! We are a collection of volunteers and starting a new project in a community in the same niche. Your blog provided us valuable information to work on. You have done a outstanding job!
Hello my loved one! I wish to say that thisarticle is amazing, nice written and come with approximately all vital infos.I’d like to peer extra posts like this .
Aw, this was an incredibly nice post. Spending some time and actual effort to make a very good articleÖ but what can I sayÖ I hesitate a whole lot and don’t seem to get anything done.
This is a good tip particularly to those new to the blogosphere. Simple but very precise information… Many thanks for sharing this one. A must read post.
I want to to thank you for this good read!! I certainly enjoyed every bit of it. I have got you book marked to check out new things you post…
Great, thanks for sharing this blog.Thanks Again. Really Great.
When I originally commented I clicked the “Notify me when new comments are added” checkbox and now each time a comment is added I get four e-mails with the same comment. Is there any way you can remove me from that service? Thanks a lot!
I blog often and I truly appreciate your content. The article has really peaked my interest. I’m going to book mark your blog and keep checking for new information about once per week. I subscribed to your RSS feed too.
ตอนแรกผมว่าเว็บไซต์ไหนก็เหมือนกัน เพราะเหตุว่าเข้าไปก็พบเกมเดิมๆแต่เอาเข้าจริงๆมันต่างกันนะครับ ยิ่งเว็บไหนที่เวลาฝากถอนจึงควรผ่านบุคลากรอันนี้ผมชังสุดเลย เสียเวล่ำเวลา ส่วนตัวผมว่า UFABET ดีสุดเลยจ๊ะครับ เค้าใช้ระบบอัตโนมัติ
Good way of telling, and nice post to take information on the topic of my presentation topic, which i am going to deliver in college.
I have not checked in here for a while because I thought it was getting boring, but the last few posts are good quality so I guess I¡¦ll add you back to my daily bloglist. You deserve it my friend 🙂
Looking forward to reading more. Great post.Much thanks again. Want more.
Terrific things you have always shared with us. Just keep writing this kind of posts. The time which was wasted in travel for tuition now it may be used for studies.Thanks cupones.mis-ofertas.net
Excellent way of telling, and fastidious paragraph to get data about my presentation focus, which i am going to convey in university.
If you want to see what IMDB is, please click our name (IMDB) 001
Really informative blog post.Really looking forward to read more. Much obliged.
I’d love to be described as a part of group the place I may get suggestions from other experienced individuals that share a similar curiosity. Should you have any tips, make sure you let me know. Thank you.
I’ve only just arrived choffy vs crio bru The Australian dollar rose to its highest in more than aweek against the greenback, bolstered by strong factory outputdata from China, though strategists warned the Aussie’s reboundcould be temporary.
Heya i’m for the first time here. I found this boardand I in finding It truly helpful & it helped me out a lot.I’m hoping to give one thing back and help others like you aidedme.
That is a very good tip particularly to those fresh to the blogosphere.Brief but very accurate info… Appreciate your sharing this one.A must read article!
Hello There. I found your blog using msn. This is a very well written article. Ill make sure to bookmark it and return to read more of your useful info. Thanks for the post. Ill certainly return.
Hello there! This is my first visit to your blog! We are a collection ofvolunteers and starting a new project in a community in the same niche.Your blog provided us beneficial information to workon. You have done a outstanding job!
Im thankful for the article.Much thanks again.
I value the blog article.Thanks Again.
I really liked your article. Great.
Very good article.Really looking forward to read more. Will read on…
I am so grateful for your blog article.Really thank you! Will read on…
Muchos Gracias for your blog article.Really thank you! Really Great.
I really like and appreciate your blog post.Much thanks again. Want more.
Very informative article. Awesome.
Thanks again for the blog.Really thank you! Much obliged.
Thanks in favor of sharing such a pleasant opinion,articleis fastidious, thats why i have read it completely
Really enjoyed this blog article.Really looking forward to read more. Awesome.
Im thankful for the post.Really thank you! Really Cool.
Perfectly written content material, Really enjoyed reading through.
I wanted to thank you for this very good read!! I absolutely enjoyed every little bit of it. I’ve got you bookmarked to look at new stuff you postÖ
Major thanks for the blog article.Really thank you! Will read on…
Major thankies for the article post.Really thank you! Really Cool.
I do agree with all of the ideas you’ve presented in your post. They’re really convincing and will definitely work. Still, the posts are too short for starters. Could you please extend them a little from next time? Thanks for the post.
Aw, this was a very good post. Spending some time and actual effort to make a top notch articleÖ but what can I sayÖ I hesitate a lot and don’t manage to get nearly anything done.
lipitor manufacturer atorvastatin and antacids
Hey there! This post couldn’t be written any better! Reading this post reminds me of my previous room mate! He always kept talking about this. I will forward this article to him. Pretty sure he will have a good read. Thank you for sharing!
Thank you! Very good stuff.how do u write an essay essays writers the best essay writing service
Thanks for the blog article. Much obliged.
Thanks for sharing such a nice opinion, post is pleasant, thats whyi have read it fully
online gambling play slots slots for real money
That is a good tip particularly to those new to the blogosphere. Brief but very accurate info Many thanks for sharing this one. A must read post!
I loved your article post.Thanks Again. Will read on…
I am 39 year old female Just saying thanks!Loading…
Hi there, just wanted to say, I liked this blog post.It was funny. Keep on posting!
Really informative blog.Really looking forward to read more. Want more.
Hi there, everything is going well here and ofcourse every oneis sharing data, that’s truly fine, keep up writing.
Heya i’m for the primary time here. I found this board and I find It really helpful & it helped me out much. I hope to offer one thing back and help others like you helped me.
I am not sure where you are getting your information, but great topic.I needs to spend some time learning more or understanding more.Thanks for wonderful information I was looking for thisinfo for my mission.
Great, thanks for sharing this post.Much thanks again. Will read on…
Thank you for your blog article.Thanks Again. Want more.
Its wonderful as your other articles : D, regards for posting. “I catnap now and then, but I think while I nap, so it’s not a waste of time.” by Martha Stewart.
Im obliged for the article.Really thank you! Really Cool.
When someone writes an paragraph he/she retains theplan of a user in his/her mind that how a user can understand it.Thus that’s why this article is amazing. Thanks!my blog post: Molten Keto Garcinia Review
Major thankies for the blog post.Really thank you! Cool.
There’s a three month trial period maxalt a triptan and celexa Last Christmas, more than $1,000 was charged to my credit card at a luxury department store
Aw, this was a very nice post. In idea I wish to put in writing like this additionally – taking time and actual effort to make a very good article… however what can I say… I procrastinate alot and certainly not seem to get one thing done.
ivermectin for gapeworm ivermectin for rabbits
Very neat article post.Really looking forward to read more. Want more.
When some one searches for his essential thing, thus he/she desires to be available that in detail, so that thing is maintained over here.
sildenafil suspension shelf life of sildenafil
There’s definately a lot to learn about this topic.I really like all the points you made.
Démo trop courte (10 mins max) ! Le tryclope rouge, on ne le voit qu’en vidéo… et juste un nouveau flingue. Sinon j’ai pas compris le debut …
Nicely put, Appreciate it. canadian pharmacies online
A round of applause for your post.Really looking forward to read more. Really Great.
Thanks for the article post.Really thank you! Awesome.
wow, awesome blog.Really looking forward to read more. Will read on…
magnificent publish, very informative. I’m wondering why the other experts of this sector do not realize this. You should continue your writing. I’m confident, you’ve a great readers’ base already!
modalert 200 provigil side effects modafinil side effects
Hello, just wanted to mention, I loved this article. It was practical. Keep on posting!
Im grateful for the blog.Thanks Again. Great.
ventolin uk pharmacy: blue albuterol inhaler – ventolin nzvaltrex generic in mexico
Zu glänzenden Lacken und ihren Auswirkungen wurden zahlreiche Studien durchgeführt
prednisone 20 – prednisolone prednisone best pharmacy prednisone
What’s up, after reading this remarkable post i am too cheerful toshare my know-how here with colleagues.
Do you have a spam issue on this blog; I also am a blogger, andI was wanting to know your situation; many of us have created some nicepractices and we are looking to exchange solutions with otherfolks, please shoot me an e-mail if interested.
Thank you for another informative blog. Where else could I get that kind of information written in such a perfect way? I’ve a project that I am just now working on, and I’ve been on the look out for such information.
Muchos Gracias for your article.Much thanks again. Cool.
What’s up all, here every one is sharing these kinds of familiarity, thereforeit’s nice to read this blog, and I used to visit this blog everyday.
I am not sure where you are getting your information, but good topic. I needs to spend some time learning much more or understanding more. Thanks for excellent information I was looking for this info for my mission.
I truly appreciate this blog article.Really looking forward to read more. Want more.
Hi my family member! I wish to say that this post is awesome, great written and include almost all vital infos. I’d like to see extra posts like this .
Kudos. Fantastic information!i need someone to write my essay college essay i need help writing my personal statement
I value the article.Much thanks again. Much obliged.
wow, awesome blog. Cool.
Hello.This post was extremely remarkable, particularly since I was browsing for thoughts on this subject last Thursday.
Thanks-a-mundo for the blog.Thanks Again. Really Great.
Im obliged for the blog post. Really Great.
Really enjoyed this article. Really Cool.
Really enjoyed this article.Really thank you! Really Cool.
how does metformin work metformin recalled 2020 metformin side effects
Thanks for the article post.Really thank you! Awesome.
Hello There. I found your blog the use of msn. That is a reallysmartly written article. I’ll be sure to bookmark it and return to learn more ofyour useful info. Thanks for the post. I’ll certainly comeback.
Remarkable! Its really awesome paragraph, I have got much clear idearegarding from this piece of writing.
Now if you are saying to yourself, “What”, then I have your attention. It is extremely a lot essential to go through enough apply before venturing into on-line gaming portals. I think I have a small in typical with each of them.
Do you know what you want from the sport in the future, and are you using steps to meet any objectives? We had been there to inform him what we needed and how we needed it and he produced the changes.
vardenafil 120 pills – vardenafil online bestellen usa pharmacy online order vardenafil
It is truly a great and useful piece of information. I am glad that you just shared this useful info with us. Please stay us informed like this. Thank you for sharing.
Normally I don’t read post on blogs, however I wish to say that this write-up very pressured me to try and do it! Your writing style has been amazed me. Thanks, very great post.
กระแสพนันออนไลน์ว่าแรงแล้ว ยังแรงไม่สู้โปรโมชั่นเด็ดๆที่ UFABET ขยันเอาอกเอาใจสมาชิกมากมายนะครับ และก็ถูกอกถูกใจผมซะด้วย ไม่ใช่แค่เรื่องโปรโมชั่นครับผม ผมถูกใจที่เค้ามีเกมให้เลือกมาก อีกทั้งพนันบอล บาคาร่า ยิงปลา สล็อต เกมใหม่ๆมีหมด
There’s definately a great deal to know about this topic. I like all the points you’ve made.
I haven’t checked in here for some time because I thought it was getting boring, but the last several posts are good quality so I guess I will add you back to my daily bloglist. You deserve it my friend 🙂
Appreciate you sharing, great blog.Much thanks again. Great.
ivermectin for humans for sale ivermectin for humans for sale
I am so grateful for your post.Thanks Again. Want more.
Im obliged for the blog post.Really thank you! Fantastic.
That is a very good tip especially to those fresh to the blogosphere. Simple but very accurate informationÖ Appreciate your sharing this one. A must read post!
This is nicely put! .help on writing an essay help thesis writing which essay writing service is the best
Awesome article post.Much thanks again. Will read on…
Ennlpr – furosemidelasixx.com Kefaco buwllo
Hey there! I just wanted to ask if you ever have any problems with hackers?My last blog (wordpress) was hacked and I ended up losing months of hard work due to no backup.Do you have any methods to protect against hackers?
albuterol inhaler – ventolin medication ventolin 90 mcg
Oh my goodness! an incredible article dude. Thank you Nonetheless I am experiencing problem with ur rss . Don’t know why Unable to subscribe to it. Is there anybody getting similar rss problem? Anyone who is aware of kindly respond. Thnkx
Touche. Great arguments. Keep up the good spirit.
Currently it sounds like Movable Type is the preferred blogging platform out there right now.(from what I’ve read) Is that what you are using on yourblog?
Really informative post.Really looking forward to read more. Fantastic.
Very good post.Really thank you! Keep writing.
I really like and appreciate your blog.Really thank you!
I will right away take hold of your rss feed as I can’t in finding your e-mail subscription link or newsletter service. Do you have any? Please let me realize in order that I may just subscribe. Thanks.
Thanks for sharing, this is a fantastic blog post.Really looking forward to read more. Keep writing.
Great forum posts. With thanks! finasteride for hair loss
Muchos Gracias for your blog article. Really Great.
I like what you guys are usually up too. Such clever work and coverage! Keep up the wonderful works guys I’ve included you guys to blogroll.
This is my first time visit at here and i am truly happy to read all at alone place.
order modafinil modafinil side effects modafinil provigil
Wow, great blog.Much thanks again.
Hey! Would you mind if I share your blog with my facebook group?There’s a lot of folks that I think would really enjoy your content.Please let me know. Thanks
shared service center essay here archaeology essay writing service
Wow, great blog post.Really thank you! Keep writing.
Im grateful for the blog.Much thanks again. Want more.
I never thought about it that way, but it makes sense!Static ISP Proxies perfectly combine the best features of datacenter proxies and residential proxies, with 99.9% uptime.
I really enjoy the blog.Really looking forward to read more. Cool.
This is one awesome article post.Thanks Again. Keep writing.
A big thank you for your article post.Thanks Again. Much obliged.
I really enjoy the blog. Will read on…
Im grateful for the blog.Much thanks again. Really Great.
I wanted to thank you for this fantastic read!! I certainly loved every bit of it. I’ve got you book-marked to check out new stuff you postÖ
I love it when people get together and share opinions. Great blog, continue the good work!
It as hard to find experienced people on this topic, however, you seem like you know what you are talking about! Thanks
It’s going to be end of mine day, except before end I am reading this wonderful piece of writing to improve my know-how.
Thanks-a-mundo for the blog article. Much obliged.
best essay service – academic writers online help with essays
time to time knows what PlayStation games, this may prove
Say, you got a nice blog post.Really looking forward to read more. Cool.
Very informative article post.Thanks Again. Fantastic.
Exceptional post but I was wanting to know if you could writea litte more on this topic? I’d be very grateful if you could elaborate a little bit further.Thank you!
Thank you ever so for you blog post.Thanks Again.
I love reading a post that will make men and women think.Also, many thanks for allowing me to comment!
provigil weight loss — provigil dosage modafinil and alcohol
moss creek apartments las casitas apartments apartments in meridian
Say, you got a nice article.Much thanks again. Cool.
Looking forward to reading more. Great article. Want more.
I don’t even know the way I ended up right here, butI thought this publish was once great. I don’t know who you arehowever definitely you’re going to a famous blogger for those who are not already.Cheers!
Hello there! This is my first visit to your blog! We are a group of volunteers and starting a new project in a community in the same niche. Your blog provided us valuable information to work on. You have done a extraordinary job!
I think this is a real great post.Thanks Again.
Hello my friend! I wish to say that this post is awesome, nice written and include approximately all important infos.I’d like to see more posts like this .
Im grateful for the blog article.Really thank you! Really Cool.
Looking forward to reading more. Great article post.Much thanks again. Will read on…
Im obliged for the article post.Really thank you! Really Great.
This is one awesome post.Really looking forward to read more. Really Great.
Hello just wanted to give you a quick heads up and let you know a few ofthe pictures aren’t loading correctly. I’m not sure why but I think its a linking issue.I’ve tried it in two different browsers and both show the same results.
David Bowie is a classic, i like all his songs during the old days.”
A round of applause for your blog.Really thank you!
Select a coupon template for virtually any gift or situation, customise it in Crello Editor,then electronic mail it or obtain and print.Free Coupons – Get Free Coupon Online – Store Shipping Couponfree coupons
It’s actually a cool and useful piece of information. I am satisfied that you just shared this helpful info with us. Please stay us up to date like this. Thanks for sharing.
Thank you for some other excellent article. Where else may anybody get that kind of information in such a perfect manner of writing? I have a presentation subsequent week, and I am at the search for such info.
ivermectin paste for cattle ivermectin pill for lice
Hola! I’ve been following your blog for a while now and finally gotthe courage to go ahead and give you a shout out from Houston Texas!Just wanted to mention keep up the fantastic job!
I enjoy what you guys are up too. This kind of clever work andreporting! Keep up the amazing works guys I’ve incorporated youguys to my own blogroll.
This is one awesome post.Really looking forward to read more. Really Great.
Really enjoyed this blog. Will read on…
Awesome blog.Really looking forward to read more. Keep writing.
Thanks a lot for the article post. Want more.
Im grateful for the blog.Thanks Again. Will read on…
I really like and appreciate your post.Thanks Again. Really Great.
I am so grateful for your post.Much thanks again. Awesome.
Im grateful for the article post.Much thanks again. Keep writing.
Great article post.Much thanks again. Fantastic.
Xoilac Tv Trực Tiếp đá Bóng 12betĐội tuyển nước Việt Nam chỉ cần thiết một kết quả hòa có bàn thắng nhằm lần loại hai góp mặt tại World Cup futsal. Nhưng, để làm được điều này
Hmm is anyⲟne elѕe encountering problems with the pictures on this blog loading?I’m trying to figᥙre out if its a problem on my end ᧐r if it’s thе bⅼog.Any suggestions ѡould be grеatly appreciated.
Thank you for your article post.Really looking forward to read more. Really Cool.
Whoah this blog is fantastic i really like reading your posts. Stay up the good work! You already know, many persons are hunting around for this information, you can help them greatly.
Best choice fashion clothing store.Discover the last trendy clothes in your favorite fashion accessories store. International free shipping!
When some one searches for his necessarything, so he/she needs to be available that in detail, therefore thatthing is maintained over here.Feel free to surf to my blog … cannabis doctors
Great blog.Thanks Again. Awesome.
There are also on-line slots bonus rounds that can be activated randomly when playing, offering massive payouts and rewards.
Inspiring story there. What occurred after? Take care!
Thanks for sharing, this is a fantastic article post.Much thanks again. Awesome.
to sell them, of course we hundreds if not thousands of
purchase oral ivermectin ivermectin – generic ivermectin
I wanted to thank you for this fantastic read!!I certainly loved every little bit of it. I have got you saved as afavorite to look at new stuff you post?Here is my blog post: Pearline
Really appreciate you sharing this article. Great.
I want to to thank you for this fantastic read!! I certainly enjoyed every little bit of it. I’ve got you book-marked to check out new things you post횜
stromectol ivermectin tablets ivermectin oral 0 8 – stromectol tablets for humans
I like looking through a post that will make men and women think. Also, thanks for allowing for me to comment!
Pulver und Kapseln des Pilzes können Ihr allgemeines Wohlbefinden und Ihren Hautzustand verbessern
Thank you one million and please carry on the rewarding
I really like and appreciate your article post.Really looking forward to read more. Great.
You actually mentioned it wonderfully!help me write my college essay writers essay custom writings plagiarism
over the counter ed medication: red erectile dysfunction pill kamagra pills
Hi, its nice piece of writing concerning media print, we all know media is a great source of facts.
Hello.This post was extremely remarkable, particularly because I was investigating for thoughts on this topic last Friday.
Fantastic post.Thanks Again. Fantastic.
glendale apartments for rent oakwood apartments los angeles gravity apartments
I am incessantly thought about this, thanks for putting up.my blog post – tips honey
great issues altogether, you simply won a logo new reader.What would you suggest about your submit that you made a few days in the past?Any certain?
Hey! I know this is kind of off topic but I was wondering if you knewwhere I could get a captcha plugin for my comment form? I’m using the same blogplatform as yours and I’m having problems finding one?Thanks a lot!
This is a good tip particularly to those new to the blogosphere. Brief but very precise information… Thanks for sharing this one. A must read post!
You could certainly see your expertise within the article you write.The sector hopes for even more passionate writers such as you who are not afraid to say howthey believe. Always follow your heart.
Hey there! I know this is kinda off topic but I was wonderingif you knew where I could get a captcha plugin for my commentform? I’m using the same blog platform as yours and I’m having problemsfinding one? Thanks a lot!
¿Qué es el \”proceso inactivo del sistema\” y por qué se aplica tanta CPU?
help writing essays essay writing university do my paper
An intriguing discussion is worth comment. I do believe that you ought to write more on this topic, it might not be a taboo matter but generally folks don’t speak about such topics. To the next! Cheers!!
Greetings! Very useful advice in this particular article!It is the little changes that will make the greatest changes.Thanks for sharing!
When someone writes an article he/she maintains the thought ofa user in his/her mind that how a user can know it. Therefore that’s why this paragraph is outstdanding.Thanks!
My brother recommended I might like this blog. He was totally right.This post actually made my day. You cann’t imaginejust how much time I had spent for this information! Thanks!
Por lo general, tu erección comenzará a desinflarse en un par de minutos.
I do not even understand how I stopped up right here, but I thoughtthis publish used to be great. I don’t realize who you might be however certainlyyou are going to a famous blogger in case you are not already.Cheers!
This article will assist the internet visitors for building up new blog or even a blog from start to end.
I do not even know how I ended up right here, however I believed this submit was once great.I do not understand who you’re but certainly you’re going to a well-known blogger should you aren’t already.Cheers!
from somewhere? A theme like yours with a few simple adjustements
Hi, yes this post is in fact pleasant and I have learned lot of things from it on the topic of blogging.thanks.
Awesome! Its in fact remarkable post, I have got much clear idea regarding from this paragraph.
It is really a nice and helpful piece of information. I am happy that you simplyshared this useful information with us. Please stay usinformed like this. Thank you for sharing.
An intriguing conversation deserves comment. I think that you need to write much more on this subject, it might not be a forbidden subject however typically people are inadequate to speak on such topics. To the next. Cheers
Nice answers in return of this issue with real arguments and telling all on the topic of that.
how come some blogs in a blogroll do not have their most recent post listed and others do? How to change that?
What’s up, I desire to subscribe for this blog to get latest updates,therefore where can i do it please help.
Hello colleagues, how is all, and what you desire to say concerning this article, in my view its really awesome for me.
Wow, great post.Really looking forward to read more. Will read on…
Ahaa, its pleasant conversation concerning this article here atthis blog, I have read all that, so now me also commentinghere.
cirla tadalafil side effects tadalafil citrate liquid
At this time it looks like Drupal is the top bloggingplatform available right now. (from what I’ve read) Is that what you are using on your blog?
What’s up mates, its fantastic paragraph on the topic of teachingand fully explained, keep it up all thetime.
Yorum’da anahtar kelimeye link vermek için şeklinde kullanınız. Yorumlarınız çok uzun olmasın.
Greetings! Very useful advice within this article! It is the little changes that make the biggest changes. Thanks a lot for sharing!
fabuloso este conteúdo. Gostei bastante. Aproveitem e vejam este conteúdo. informações, novidades e muito mais. Não deixem de acessar para se informar mais. Obrigado a todos e até mais. 🙂
What’s up colleagues, pleasant paragraphand good arguments commented at this place, I am in fact enjoying by these.
You can definitely see your expertise in the work you write.The sector hopes for even more passionate writers likeyou who are not afraid to mention how they believe. Alwaysgo after your heart.
ven more as you reading me right games using solely our Playstation
The sportsbook winds up with the majority of dollars coming in on that side, but a lot much less on the Badgers.
Hmm is anyone else having problems with the images on this blog loading? I’m trying to figure out if its a problem on my end or if it’s the blog. Any feed-back would be greatly appreciated.
priligy pills usa dapoxetine pharmacy dapoxetine 2018
purchase stromectol – ivermectin uk ivermectin pills canada
I don’t even know the way I finished up here, but I believed this publish was great. I don’t understand who you are but definitely you are going to a well-known blogger in case you aren’t already 😉 Cheers!
malden apartments mulberry apartments evolve apartments
It’s an remarkable paragraph in support of all the internet users;they will obtain benefit from it I am sure.
wall street darknet market best darknet markets
Aw, this was an extremely good post. Taking a few minutes and actual effort to make a very good articleÖ but what can I sayÖ I procrastinate a whole lot and never manage to get anything done.
When someone writes an post he/she maintains the idea ofa user in his/her mind that how a user can know it. So that’s whythis article is outstdanding. Thanks!
That is a very good tip particularly to those fresh to the blogosphere. Simple but very accurate information… Appreciate your sharing this one. A must read article!
There’s certainly a great deal to learn about this subject.I love all of the points you have made.
Hi Nani, It was a ready theme that I picked up from word press.
What’s Taking place i am new to this, I stumbled upon this I have discovered It absolutely useful and it has aided me out loads.I’m hoping to contribute & assist other customers like its helped me.Great job.
Major thankies for the blog article.Really looking forward to read more. Really Great.
I loved your blog.Much thanks again.
Very informative post.Thanks Again. Much obliged.
I cannot thank you enough for the post.Thanks Again. Will read on…
Im obliged for the blog.Thanks Again. Want more.
Major thankies for the article post. Really Great.
wow, awesome blog.Much thanks again. Awesome.
Hey, thanks for the blog. Keep writing.
Great information. Lucky me I ran across your blog by chance (stumbleupon). I have book marked it for later!
Thanks a lot, A lot of stuff.essay about college writing an application essay resume writing services online
I value the blog.Really thank you! Cool.
Im thankful for the blog article.Much thanks again. Really Cool.
what is a great credit score free credit score check your credit report online chase credit
gre essay examplesessay typer comreword essay
You reported that adequately!personal essay writing essay homework help online help with writing a personal statement
Thanks for the blog post. Fantastic.
I’m not sure where you’re getting your information, but great topic.I needs how to install portable air conditioner spend some time learning more or understanding more.Thanks for great info I was looking for this info for my mission.
Wow! It is also good paragraph about JavaScript, I am genuinely keen of learning JavaScript. thanks admin
Awesome blog, I’m going to spend more time researching this topicslot gacor
This is one awesome post.Really looking forward to read more. Want more.
what is hydroxychloroquine prescribed for aralen medication
I needed to thank you for this great read!! I absolutely loved every little bit of it. I have got you bookmarked to check out new stuff you postÖ
ama hydroxychloroquine chloroquine mechanism of action
Itís hard to come by knowledgeable people in this particular topic, but you sound like you know what youíre talking about! Thanks
When someone writes an post he/she keeps the idea of a userin his/her mind that how a user can know it.So that’s why this paragraph is outstdanding. Thanks!
You could certainly see your skills within the paintings you write. The world hopes for more passionate writers like you who are not afraid to say how they believe. All the time go after your heart.
These are truly fantastic ideas in about blogging.You have touched some nice factors here. Any way keep up wrinting.
I truly appreciate this blog.Much thanks again. Want more.
reliable rx pharmacy reviews cvs pharmacy store finder
Hi there, just became aware of your blog through Google, and foundthat it is really informative. I am going to watch out forbrussels. I will be grateful if you continue this in future.A lot of people will be benefited from your writing.Cheers!
usa pharmacy india: generic pills india best online international pharmacies india
I think this is a real great article. Cool.
When I originally commented I clicked the „Notify me when new comments are added” checkbox andnow each time a comment is added I get several emails with the same comment.Is there any way you can remove people from that service?Thanks!
coursework psychology creative writing coursework
purchase stromectol online ivermectin lice oral – stromectol order
Say, you got a nice blog article.Really thank you! Fantastic.
Thank you for your blog article.Thanks Again. Cool.
I am 44 year old female Just saying thanks!
Cómo numerar organismos vacíos o vacíos en la placa de youtube
Wow, great article post.Really thank you! Want more.
each time i used to read smaller posts that aswell clear their motive, and that is also happening with this piece of writing which I am reading here.my blog post Pure Form Keto
Thanks for any other excellent article. The place else may just anyone get that kind of info in such a perfect method of writing? I have a presentation next week, and I’m at the search for such information.
I’ll right away grasp your rss as I can’t in finding your e-mail subscription hyperlink or newsletter service. Do you’ve any? Kindly permit me recognize so that I may just subscribe. Thanks.
male ed pills – erectile dysfunction meaning ed pills that work quickly
Very informative post.Really looking forward to read more. Want more.
What’s Happening i’m new to this, I stumbled upon this I have discovered It absolutely useful andit has helped me out loads. I hope to contribute & aid different customers like its helped me.Great job.
Aw, this was a really nice post. Finding the time and actual effort to create a superb articleÖ but what can I sayÖ I put things off a whole lot and don’t manage to get anything done.
where can i purchase ivermectin stromectol online
I loved your article.Much thanks again. Fantastic.
เคล็ดลับซื้อของออนไลน์ยังไงให้ปลอดภัย และได้ของจริง id SKIN ทุกวันนี้การซื้อขายสินค้ามีความสะดวกและรวดเร็วมาก ไม่จำเป็นต้องเดินไปถึงหน้าร้าน ก็สามารถซื้อของผ่านหน้าจอคอมพิวเตอร์ หรือทางออนไลน์ได้ ซื้อของออนไลน์
This is a very good tip particularly to those fresh to the blogosphere. Short but very accurate infoÖ Many thanks for sharing this one. A must read post!
This is my first time pay a quick visit at here and i am genuinely pleassant to read all at single place.
research paper thesis food essay writing wedding speech writing
Major thanks for the post.Much thanks again.
is duloxetine safe for liver disease cymbalta and diarrhea
You could definitely see your expertise in the work you write. The world hopes for even more passionate writers such as you who aren’t afraid to say how they believe. Always go after your heart.
Hi everybody, here every person is sharing these kinds of familiarity, so it’s good to read this blog, and I used to go to see this blog every day.
A motivating discussion is worth comment.I do believe that you should publish more on this topic, it may not be a taboo subjectbut usually people don’t talk about these topics. To the next!Best wishes!!
wow, awesome blog article.Really looking forward to read more. Much obliged.
Amazing! Its really remarkable paragraph, I have got muchclear idea on the topic of from this piece of writing.Feel free to surf to my blog :: indoor growing
troubles and we recommend leaving approaching young people in the order clenbuterol
tretinoin canada pharmacy us pharmacy online
Thanks for sharing, this is a fantastic blog article. Fantastic.
When you will have used the hack instrument for the roblox game, you can get the next features that are talked about as follows.
Im thankful for the blog post. Great.
plaquenil retinopathy chloroquine phosphate
This is a very good tip especially to those new to the blogosphere. Short but very accurate infoÖ Thanks for sharing this one. A must read post!
Great, thanks for sharing this blog article.Really thank you! Awesome.
Very interesting information!Perfect just what I was searching for! “Love endures only when the lovers love many things together and not merely each other.” by Walter Lippmann.
Hey, thanks for the blog.Really looking forward to read more. Much obliged.
I love what you guys are usually up too. Such clever work and exposure! Keep up the awesome works guys I’ve you guys to my personal blogroll.
When someone writes an paragraph he/she maintainsthe plan of a user in his/her mind that how a user can be aware of it.Therefore that’s why this piece of writing is great.Thanks!
Nicely put, Thank you.essay writing technique pay for paper writing company report writing
Does anyone have any idea Operation Vapor ecigarette store in 2556 Telegraph Ave Suite 007 offers vape juice manufactured by Drop Pops eJuice? I have tried sending them an email at at heightsvaporstation@hotmail.com
I think this is a real great blog post.Really thank you! Cool.
I blog quite often and I genuinely appreciate your content. This great article has truly peaked my interest. I am going to book mark your blog and keep checking for new details about once per week. I opted in for your RSS feed too.
qhtlvcjzf vqpjc xawscux whiy ztoqzffbwmqdwdf
xsypievqh xgnrb njixyno jjnf uyhrktohphssrvs
pirlmjyxo noano ngwjzls ngse qsxumuetwbpgcqh
I am continuously browsing online for tips that can benefit me. Thanks!
Hey, thanks for the blog.Much thanks again. Really Great.
Very informative post.Much thanks again. Keep writing.
Hey, thanks for the article post.Really looking forward to read more. Want more.
Very informative article.Much thanks again. Much obliged.
Wow, great post.Thanks Again. Want more.
Muchos Gracias for your blog post.Really looking forward to read more. Fantastic.
Thank you ever so for you article post.Thanks Again. Fantastic.
Thanks-a-mundo for the post.Really thank you! Awesome.
Really informative post.Really looking forward to read more. Really Great.
I really like and appreciate your blog post.Much thanks again. Really Great.
When someone writes an paragraph he/she retains the image of a user in his/her mind that how a user can know it. Therefore that’s why this piece of writing is perfect. Thanks!
Thanks-a-mundo for the article post.Really looking forward to read more. Cool.
It’s great that you are getting thoughts from this post as well as from our dialogue madeat this time.Feel free to visit my blog post – your quest bars (t.co)
console that could rival it is an tik tok free real followers
Appreciate you sharing, great blog post. Awesome.
I am not sure where you’re getting your info, but great topic.I needs to spend some time learning more or understanding more.Thanks for fantastic info I was looking for this info for my mission.
Thanks , I’ve recently been looking for info about this subject for ages and yours is the best Ihave found out so far. But, what in regards tothe bottom line? Are you sure concerning the source?
Riches A dream in the night. Fame A gull floating on water.
Incredible lots of awesome facts.what to write for a college essay college goals essay help with writing a thesis
Howdy! Would you mind if I share your blog with my twittergroup? There’s a lot of people that I think would really appreciate your content.Please let me know. Thank you
I loved your article.Really thank you! Really Great.
After I initially commented I clicked the -Notify me when new feedback are added- checkbox and now every time a remark is added I get four emails with the identical comment. Is there any method you’ll be able to remove me from that service? Thanks!
verge apartments elkhorn apartments river vista apartments
Hi, just wanted to tell you, I loved this blogpost. It was inspiring. Keep on posting!
plaquenil side effects mayo clinic chloroquine phosphate generic name
Thank you ever so for you blog.Really looking forward to read more. Will read on…
Generally I don’t learn post on blogs, however I would like to say that this write-up very forced me to check out and do so! Your writing taste has been amazed me. Thank you, very nice article.
scholarship essay examples about yourselfhow to write an essay for college admissionessay titles
Muchos Gracias for your blog article.
need help writing a paperediting services online
free live nude chat online adult chat women with nice boobs pron
Cechuje nas indywidualne podejście do klienta
Hey there! Do you know if they make any plugins to assist with Search Engine Optimization? I’m trying to get my blog to rank for some targeted keywords but I’m not seeing very good gains. If you know of any please share. Cheers!
great publish, very informative. I’m wondering why the other experts of this sector do not notice this. You should proceed your writing. I am sure, you’ve a great readers’ base already!
I am so grateful for your article.Really thank you! Fantastic.
reliable pharmacy rx cvs pharmacy store timings
Enjoyed every bit of your blog article.Thanks Again. Will read on…
I appreciate you sharing this article post.Really thank you! Keep writing.
Enjoyed every bit of your article post.Thanks Again. Really Great.
Appreciate you sharing, great article.Really thank you! Much obliged.
Thanks a lot for the article post.Much thanks again. Want more.
A round of applause for your article.Thanks Again. Really Great.
Looking forward to reading more. Great article post.Much thanks again. Really Cool.
It’s hard to find educated persons for this subject, even so, you seem to be you determine what you’re talking about! Thanks
online med pharmacy: canadian pharmacy meds – india pharmacy
This piece of writing provides clear idea designed for the new users of blogging,that genuinely how to do running a blog.
Whoa tons of amazing data!custom essay writing services writing paper help best resume writing services nj
Thanks again for the blog article.Much thanks again. Great.
I needed to thank you for this fantastic read!! I definitely enjoyed every little bit of it. I’ve got you bookmarked to check out new things you post…
Great post however I was wanting to know if you could write a litte more on this subject?I’d be very thankful if you could elaborate a littlebit more. Bless you!
I feel like I am always open to new challenges in life. So there’s no way to Liverpool block any opportunities that come your way, especially in the future,” the 20-year-old told ITV Sport.
ivermectin dewormer ivermectin covid 19 uptodate Loading…
Good post but I was wondering if you could write a litte more on this topic? I’d be very thankful if you could elaborate a little bit more. Kudos!
A big thank you for your post. Awesome.
Thanks so much for the article post.Much thanks again. Much obliged.
Im obliged for the blog post. Fantastic.
Thanks for the blog article.Really looking forward to read more. Great.
Appreciate you sharing, great blog article.Really looking forward to read more.
I really liked your blog post.Much thanks again. Great.
Thanks-a-mundo for the article. Really Great.
I truly appreciate this post.Thanks Again. Awesome.
I loved your blog article.Much thanks again. Much obliged.
Hey, thanks for the article.Really thank you! Awesome.
Wow, great article post.Really thank you! Cool.
Im obliged for the post.Really thank you! Really Great.
Thank you for your article post.Thanks Again.
Thanks again for the post.Thanks Again. Want more.
Hi there colleagues, nice post and nice arguments commented at this place,I am genuinely enjoying by these.
This is my first time pay a visit at here and i am in fact happy to read all at singleplace.
I don’t even understand how I stopped up right here, however I believed this publish was once great.I do not understand who you might be but certainly you’re going to a famous blogger for thosewho aren’t already. Cheers!
Hi i am kavin, its my first time to commentinganywhere, when i read this article i thought i could also create comment dueto this brilliant post.
I cannot thank you enough for the blog post.Really looking forward to read more. Will read on…
Paragraph writing is also a excitement, if you be familiar with after that you can write if not it is complicated to write.
Amazing! Its truly remarkable paragraph, I have got much clear idea about from this piece ofwriting.
It’s actually a great and helpful piece of information. I am glad that you shared this helpful info with us. Please keep us informed like this. Thanks for sharing.
I’m really impressed with your writing skills and also with the layout on your blog. Is this a paid theme or did you modify it yourself? Either way keep up the nice quality writing, it?s rare to see a nice blog like this one nowadays..
I needed to thank you for this wonderful read!! I absolutely loved every bit of it. I have you book marked to check out new stuff you postÖ
That is a very good tip especially to those fresh to the blogosphere. Simple but very accurate informationÖ Thank you for sharing this one. A must read post!
modafinil side effects modafinil generic provigil pill
Greetings! Very helpful advice in this particular post! It’s the little changes that produce the most important changes. Many thanks for sharing!
Hey! I just wanted to ask if you ever have any trouble with hackers? My last blog (wordpress) was hacked and I ended up losing many months of hard work due to no back up. Do you have any solutions to protect against hackers?
Fantastic article post.Really thank you! Much obliged.
Your blog has the same post as another author but i like your better.–**”
scoliosisHello There. I found your blog using msn. This is an extremely well written article.I will be sure to bookmark it and return to read more of your useful info.Thanks for the post. I’ll definitely return. scoliosis
ivermectin medicine – ivermectin 4000 mcg order stromectol
past, but we have heard of a lot All of the things we named falls
Aw, this was an extremely good post. Finding the time and actual effort to generate a top notch article… but what can I say… I hesitate a lot and don’t manage to get nearly anything done.
woodland springs apartments marchwood apartments bridgepoint apartments
ed in young men pills from canada – top rated ed pills
Hello friends, its impressive paragraph on the topic of educationand fully defined, keepit up all the time.
I value the blog post.Really thank you! Really Great.
I value the article.Really thank you!
Appreciate you sharing, great blog article.Much thanks again. Really Cool.
Say, you got a nice blog.Really thank you!
I loved your article.
I am so grateful for your post.Much thanks again. Really Great.
Thank you ever so for you article. Much obliged.
Really enjoyed this blog post.Really thank you! Fantastic.
Enjoyed every bit of your post.Much thanks again. Will read on…
Greetings! Very useful advice in this particular article! It’s the little changes that make the most important changes. Thanks for sharing!
There’s definately a great deal to learn about this issue. I really like all the points you’ve made.
Usually I don’t read article on blogs, but I would like to say that this write-up very forced me to try and do so! Your writing style has been amazed me. Thanks, quite nice article.
I need to to thank you for this fantastic read!! I definitely enjoyed every little bit of it. I have got you saved as a favorite to look at new things you postÖ
Thanks a lot for the post.Really thank you! Great.
Hello, you used to write great, but the last several posts have been kinda boring?I miss your tremendous writings. Past several posts are justa bit out of track! come on!my blog various low-carb diets
I needed to thank you for this fantastic read!! I definitely enjoyed every little bit of it. I have got you saved as a favorite to check out new things you postÖ
There is definately a great deal to know about this issue. I like all of the points you have made.
Great blog article. Really Cool.
Thanks so much for the article.Thanks Again. Will read on…
Im obliged for the blog post.Really looking forward to read more. Cool.
There’s certainly a great deal to know about this subject. I love all the points you’ve made.
I really like and appreciate your article post.Thanks Again. Really Cool.Loading…
ivermectin oral solution ivermectin stromectol – ivermectin pills human
Thanks for sharing, this is a fantastic blog post.Really looking forward to read more.
Thanks a lot for the blog.Much thanks again. Much obliged.
Hello there, just became alert to your blog through Google,and found that it’s really informative. I am going to watch out for brussels.I’ll appreciate if you continue this in future.Many people will be benefited from your writing.Cheers!
what time of day should i take amlodipine why is amlodipine banned in canada
Very good article.Really thank you! Much obliged.
Im obliged for the blog.Really looking forward to read more. Much obliged.
I value the blog.Really thank you! Cool.
Im grateful for the article post.Much thanks again. Keep writing.
Im grateful for the blog post.Much thanks again. Want more.
This is one awesome post.Really thank you! Really Great.
Really appreciate you sharing this article. Will read on…
I truly appreciate this blog.
This is one awesome article post.Much thanks again. Awesome.
Great, thanks for sharing this post.Really thank you! Great.
Thanks-a-mundo for the blog article.Thanks Again. Much obliged.
I cannot thank you enough for the post. Keep writing.
This is one awesome blog.Thanks Again. Great.
Thanks for sharing your thoughts. I really appreciateyour efforts and I will be waiting for your next write ups thanks once again.
Great, thanks for sharing this blog post. Fantastic.
Hey! I know this is kinda off topic but I was wondering if you knew where I could get acaptcha plugin for my comment form? I’m using the same blog platform as yours and I’mhaving difficulty finding one? Thanks a lot!
Nice post. I was checking continuously this blog and I am impressed!Very useful info particularly the last part🙂 I care for such information much. I was seeking this particular information for a longtime. Thank you and best of luck.
Wow, great article.Thanks Again. Really Cool.
Aw, this was an exceptionally nice post. Taking a few minutes and actual effort to produce a superb articleÖ but what can I sayÖ I put things off a lot and never seem to get anything done.
I want to to thank you for this excellent read!! I certainly enjoyed every bit of it.I have you saved as a favorite to check out new stuff스피드바카라you post…
Remarkable things here. I am very happy to peer your article. Thank you so much and I am having a look forward to touch you. Will you please drop me a e-mail?
Thanks again for the article post.Really thank you! Really Great.
Thanks Kerri! I’m going through all your videos and getting ideas and then will ask away!! Last time I got tired of chicken and eggs so I’m trying to mix it up a little more. I sooo miss a Vanilla Latte right now though!! Ivie Artemis Essam
That is a really good tip especially to those new to the blogosphere. Short but very accurate infoÖ Appreciate your sharing this one. A must read article!
Hello. magnificent job. I did not imagine this. This is a excellent story.Thanks!Feel free to visit my blog; Dermicell Skin Tag Remover
A round of applause for your blog. Great.
I really like meeting useful information , this post has got me even more info! .
Hi, I do believe this is an excellent blog. I stumbledupon it 😉 I will revisit once again since i have book marked it. Money and freedom is the greatest way to change, may you be rich and continue to guide other people.
Gargzy – generic finasteride ndc Wbegzp pnozlw
Freckle Math Student Sign In Science Busters JenaMy blog – library
An interesting discussion is definitely worth comment. I think that you need to write more on this topic, it might not be a taboo matter but typically people don’t speak about these issues. To the next! Cheers!!
Hey there! Do you know if they make any plugins to assist with SEO?I’m trying to get my blog to rank for some targetedkeywords but I’m not seeing very good gains. If youknow of any please share. Kudos!
I needed to thank you for this excellent read!! I definitely enjoyed every bit of it. I have got you book-marked to look at new things you postÖ
Greetings! Very useful advice within this post! It’s the littlechanges that make the largest changes. Many thanks for sharing!
I would like to thank you for the efforts you have put in penning this blog. I am hoping to view the same high-grade blog posts from you later on as well. In fact, your creative writing abilities has motivated me to get my very own blog now 😉
Thanks so much for the blog post.Thanks Again. Awesome.
Thank you for your post.Really looking forward to read more. Want more.
I value the blog.Really thank you! Will read on…
Great post and right to the point. I am not sure if this is actually the best place to ask but do you folks have any ideea where to hire some professional writers? Thank you 🙂
I needed to thank you for this wonderful read!! I certainly enjoyedevery little bit of it. I’ve got you bookmarkedto check out new stuff you post…
Regards for helping out, wonderful information. «You must do the things you think you cannot do.» by Eleanor Roosevelt.
walgreens online pharmacy login pharmacy tech in canada
woh I love your content , saved to favorites !.
Very neat article.Really looking forward to read more. Awesome.
Gargzy – generic finasteride ndc Wbegzp pnozlw
Your style is really unique in comparison to other people I have read stuff from. I appreciate you for posting when you have the opportunity, Guess I’ll just bookmark this blog.
Fantastic article.Really looking forward to read more. Really Great.
sky pharmacy online healthy man complaints canadian pharmacy online no script
When I originally commented I clicked the “Notify me when new comments are added” checkbox and now each time a comment is added I get four emails with the same comment. Is there any way you can remove people from that service? Appreciate it!
academic writing online – writing essays for money term papers writing service
Major thanks for the article post.Really thank you!
啪lut谩 r暖啪ov媒 拧aty la lakers new era fitted cappelli navy blue wedge heel shoes hallux valgus sohle samsung note 9 slim hoesje womens nike los angeles rams 12 joe namath game royal blue alternate nfl jersey proyectodono
Hi there! I could have sworn Iíve been to your blog before but after going through some of the articles I realized itís new to me. Regardless, Iím definitely happy I stumbled upon it and Iíll be book-marking it and checking back frequently!
It’s really a great and useful piece of information. I’m glad that you shared this helpful info with us. Please keep us informed like this. Thanks for sharing.
I’d ought to seek advice from you here. Which is not something I do! I love reading an article that could make people feel. Also, many thanks allowing me to comment!slot gacor
Asking questions are really fastidious thing if youare not understanding anything totally, except this post givesfastidious understanding yet.
I value the blog article.Really thank you! Really Cool.
At this rate, you can debut as a writer. I’m so touched. Now i’m cheerful to meet you. Give thanks to you.
Aw, this was an incredibly nice post. Finding the time and actual effort to make a great article… but what can I say… I put things off a whole lot and never manage to get nearly anythingdone.Here is my blog … delta 8 thc carts near me
constantly i used to read smaller content that also clear their motive, and that is also happening with this piece of writing which I am reading now.
I appreciate your piece of work, thankyou for all the great content.
Say, you got a nice blog post.Thanks Again. Will read on…
Aw, this was a really nice post. Taking the time and actual effort to produce a really good articleÖ but what can I sayÖ I put things off a lot and don’t manage to get nearly anything done.
Hello friends, good piece of writing and good urging commented here, I am genuinely enjoyingby these.
Hi there, just wanted to tell you, I enjoyed thispost. It was funny. Keep on posting!
I like the helpful info you provide in your articles. I will bookmark your blog and check again here frequently. I’m quite certain I will learn a lot of new stuff right here! Good luck for the next!
Thank you for some other great post. The place else could anyone get that type of info in such an ideal way of writing? I’ve a presentation subsequent week, and I am on the search for such info.
Thank you for the good writeup. It in fact was a amusement account it. Look advanced to far added agreeable from you! By the way, how can we communicate?
Woh I love your blog posts, bookmarked ! .
Right now it sounds like Expression Engine is the top blogging platform out there right now. (from what I ave read) Is that what you are using on your blog?
Very good article post.Much thanks again. Want more.Loading…
Thanks so much for the blog.Really thank you! Cool.
Thank you, I’ve recently been searching for information approximatelythis subject for a while and yours is the greatest I havediscovered till now. However, what in regards to the conclusion? Are you sure concerning the supply?
İnstagram takipçi satın almak için hemen tıklayın.
interactions for ivermectinplanet complete blood count express
I needed to thank you for this excellent read!! I certainly enjoyed every little bit of it. I have you saved as a favorite to look at new stuff you post…
wonderful points altogether, you just gained a brand new reader.What would you recommend in regards to your publish that you madesome days ago? Any sure?
Hi there! I could have sworn I’ve been to this blog before but after browsing through some of the articles I realized it’s new to me. Nonetheless, I’m definitely happy I discovered it and I’ll be bookmarking it and checking back regularly.
Xseqqp – my college experience essay Ziroka xyehus
A round of applause for your article.Thanks Again. Fantastic.
Thanks-a-mundo for the article.Thanks Again. Great.
Great blog you have here.. It’s hard to find good quality writing like yours nowadays. I truly appreciate people like you! Take care!!
เล่น เกม ได้ เงิน จริง ไม่ยากอย่างที่คิด ปัจจุบันในปี 2019 ด้วยระบบเทคโนโลยีที่ทันสมัย ทำให้เราสามารถสร้างรายได้ออนไลน์ได้หลากหลายช่องทางทั้งมือถือหรือคอม เลือกเล่นเกมได้เงินได้ตลอดเวลา วันนี้เรามาจอแนะนำการ เล่นสล็อตฟรีได้เงินจริง
Hey! I know this is kind of off topic but I was wondering if youknew where I could get a captcha plugin for my commentform? I’m using the same blog platform as yours andI’m having problems finding one? Thanks a lot!
There’s definately a great deal to learn about this topic. I really like all the points you made.
Greetings! Very useful advice within this article!It’s the little changes that make the largest changes.Thanks for sharing!
Fantastic article post. Really Great.
Say, you got a nice article.Really thank you! Awesome.
Muchos Gracias for your blog article.Much thanks again. Cool.
I loved your article.Thanks Again. Fantastic.
I cannot thank you enough for the blog post. Great.
I really like it when folks get together and share ideas. Great blog, keep it up!
I really enjoy the post.Really looking forward to read more. Really Cool.
Awesome article.Thanks Again. Want more.
Really informative blog. Keep writing.
I truly appreciate this article post.Thanks Again. Want more.
Thank you ever so for you post.Really thank you! Much obliged.
Enjoyed every bit of your blog article. Great.
Major thanks for the article.Really looking forward to read more. Fantastic.
A big thank you for your article post.Really looking forward to read more. Fantastic.
Muchos Gracias for your blog.Really looking forward to read more. Much obliged.
Major thankies for the blog article.Really thank you! Fantastic.
Thanks-a-mundo for the article.Much thanks again. Much obliged.
Thanks for sharing, this is a fantastic blog article.Much thanks again. Cool.
Fantastic blog post.Really thank you! Cool.
Major thankies for the article.Really looking forward to read more. Really Cool.
I cannot thank you enough for the article post.Much thanks again. Great.
Im grateful for the blog post.
I really liked your article post.Thanks Again. Fantastic.
I really enjoy the post.Much thanks again. Keep writing.
Hi, I think your blog could be having browser compatibility problems. Whenever I take a look at your blog in Safari, it looks fine but when opening in I.E., it’s got some overlapping issues. I just wanted to provide you with a quick heads up! Besides that, wonderful site!
Way cool! Some very valid points! I appreciate you penning this article plus the rest of the site is really good.
You’re so cool! I don’t suppose I have read anything like this before. So great to discover another person with original thoughts on this topic. Really.. many thanks for starting this up. This website is something that is needed on the web, someone with some originality.
Hello there, I believe your site could possibly be having web browser compatibility problems. When I look at your blog in Safari, it looks fine however when opening in Internet Explorer, it has some overlapping issues. I just wanted to provide you with a quick heads up! Other than that, wonderful blog!
I wanted to thank you for this very good read!! I absolutely enjoyed every little bit of it. I have you book marked to check out new stuff you post…
There’s definately a great deal to learn about this subject. I love all of the points you’ve made.
Next time I read a blog, Hopefully it does not disappoint me just as much as this particular one. I mean, Yes, it was my choice to read through, however I really believed you would probably have something helpful to talk about. All I hear is a bunch of whining about something you could possibly fix if you were not too busy searching for attention.
This is a great tip especially to those new to the blogosphere. Simple but very precise info… Thanks for sharing this one. A must read post.
That is a very good tip especially to those fresh to the blogosphere. Simple but very precise information… Thank you for sharing this one. A must read post.
Pretty nice post. I just stumbled upon your blog and wished to say thatI’ve really enjoyed browsing your blog posts. In any case I will be subscribing to yourfeed and I hope you write again very soon!
I don’t even know how I ended up here, but I thought this post was great.I don’t know who you are but definitely you’re going to a famous bloggerif you are not already 😉 Cheers!
elarca.media and discount over the counter medications over the counter medication over the counter medication
Good day! I simply wish to offer you a huge thumbs up for the great info you have got here on this post. I will be coming back to your blog for more soon.
Hey there! Great post! Please when I will see a follow up!
Thanks so much for the blog post.Really looking forward to read more. Want more.
After looking over a handful of the blog posts on your blog, I really like your technique of blogging. I added it to my bookmark website list and will be checking back in the near future. Please visit my web site as well and tell me what you think.
Greetings! Very helpful advice in this particular post! It’s the little changes which will make the biggest changes. Thanks for sharing!
An impressive share! I’ve just forwarded this onto a friend who has been conducting a little research on this. And he actually ordered me dinner due to the fact that I discovered it for him… lol. So let me reword this…. Thanks for the meal!! But yeah, thanx for spending some time to discuss this matter here on your web page.
Thanks for finally talking about > بالفيديو: بعد أن رفضتها الكثير من الشركات بعدزواجها، الشابة نادية بدأت عملها في مجال الديليفري!!!
There is certainly a great deal to learn about this topic. I really like all the points you’ve made.
There’s certainly a lot to know about this subject. I really like all the points you made.
There is certainly a great deal to find out about thisissue. I like all the points you have made.
government free credit report experian plc max credit score
There is definately a lot to know about this issue. I like all of the points you’ve made.
healthy pills for ed – supermax ed pills epic ed pills
Hey There. I found your blog using msn. This is a really well written article. I will make sure to bookmark it and come back to read more of your useful information. Thanks for the post. I’ll certainly return.
helloregister you if you want win a lamborghini huracan
Hi there, its nice piece of writing on the topic of media print,we all understand media is a wonderful source of facts.
kadıköy ‘ün en iyi semtleri arasında yer alan fenerbahçe escort bayanları sizlere bir telefon kadar uzak. Büyük bir heves ve heyecan ile sizlerden gelecek telefonları beklemektedir.
There’s certainly a great deal to find out about this topic. I really like all of the points you have made.
This is a really good tip especially to those fresh to the blogosphere. Brief but very accurate info… Appreciate your sharing this one. A must read post!
You made some really good points there. I looked on the web to learn more about the issue and found most individuals will go along with your views on this site.
I really like it when people come together and share opinions. Great website, keep it up.
I couldn’t resist commenting. Exceptionally well written.
Aw, this was a very nice post. Finding the time and actual effort to create a very good article… but what can I say… I put things off a lot and never manage to get nearly anything done.
Excellent post! We will be linking to this great article on our site. Keep up the good writing.
Great web site you have here.. It’s hard to find quality writing like yours these days. I seriously appreciate people like you! Take care!!
Your style is very unique compared to other folks I’ve read stuff from. I appreciate you for posting when you’ve got the opportunity, Guess I will just bookmark this page.
This is a good tip particularly to those fresh to the blogosphere. Simple but very precise info… Thanks for sharing this one. A must read post!
Oh my goodness! Awesome article dude! Many thanks, However I am going through troubles with your RSS. I don’t know the reason why I can’t subscribe to it. Is there anybody else getting similar RSS issues? Anyone who knows the answer can you kindly respond? Thanx!
Hi, I do think this is an excellent website. I stumbledupon it 😉 I may come back once again since i have saved as a favorite it. Money and freedom is the best way to change, may you be rich and continue to guide others.
Very good article! We will be linking to this great content on our site. Keep up the great writing.
This is the perfect website for anyone who wants to understand this topic. You realize so much its almost hard to argue with you (not that I really would want to…HaHa). You certainly put a brand new spin on a topic which has been discussed for a long time. Wonderful stuff, just excellent.
This is a topic which is near to my heart… Cheers! Exactly where are your contact details though?
Howdy! I could have sworn I’ve visited this site before but after looking at some of the articles I realized it’s new to me. Anyways, I’m certainly delighted I found it and I’ll be book-marking it and checking back frequently!
Way cool! Some very valid points! I appreciate you writing this post plus the rest of the website is extremely good.
Having read this I believed it was rather enlightening. I appreciate you taking the time and energy to put this article together. I once again find myself personally spending a significant amount of time both reading and posting comments. But so what, it was still worth it.
Your style is unique in comparison to other people I have read stuff from. I appreciate you for posting when you’ve got the opportunity, Guess I’ll just bookmark this site.
This page certainly has all of the info I wanted about this subject and didn’t know who to ask.
Hello there! I just wish to give you a big thumbs up for the great information you have got here on this post. I am coming back to your blog for more soon.
This website was… how do I say it? Relevant!! Finally I have found something that helped me. Thank you!
I could not resist commenting. Perfectly written.
Good post. I learn something totally new and challenging on websites I stumbleupon on a daily basis. It will always be helpful to read articles from other writers and use a little something from other web sites.
Aw, this was an extremely good post. Taking a few minutes and actual effort to make a superb article… but what can I say… I put things off a lot and never seem to get anything done.
Can I simply say what a comfort to uncover somebody that truly understands what they’re talking about on the web. You actually know how to bring an issue to light and make it important. More people need to read this and understand this side of your story. I was surprised that you’re not more popular because you surely possess the gift.
Greetings! Very helpful advice within this article! It is the little changes that make the most significant changes. Thanks for sharing!
Hi there! I could have sworn I’ve visited this site before but after looking at many of the articles I realized it’s new to me. Anyhow, I’m certainly delighted I discovered it and I’ll be bookmarking it and checking back often!
Great web site you’ve got here.. It’s difficult to find high quality writing like yours these days. I honestly appreciate individuals like you! Take care!!
Spot on with this write-up, I honestly believe that this web site needs a great deal more attention. I’ll probably be returning to see more, thanks for the advice!
There’s certainly a great deal to find out about this issue. I like all of the points you made.
I love reading a post that will make men and women think. Also, thanks for allowing me to comment.
This blog was… how do you say it? Relevant!! Finally I’ve found something which helped me. Thank you.
Very good post. I will be experiencing some of these issues as well..
After looking at a few of the articles on your web site, I truly appreciate your technique of writing a blog. I book marked it to my bookmark webpage list and will be checking back in the near future. Please check out my website as well and tell me what you think.
This is a really good tip particularly to those new to the blogosphere. Brief but very precise info… Many thanks for sharing this one. A must read article!
Howdy! This blog post could not be written much better! Going through this post reminds me of my previous roommate! He continually kept talking about this. I’ll forward this article to him. Pretty sure he will have a good read. Many thanks for sharing!
Pretty! This has been a really wonderful post. Thank you for providing this information.
A fascinating discussion is definitely worth comment. I believe that you ought to publish more about this issue, it may not be a taboo subject but typically people do not discuss these subjects. To the next! Cheers.
Oh my goodness! Awesome article dude! Thank you, However I am encountering problems with your RSS. I don’t know the reason why I am unable to subscribe to it. Is there anybody else getting the same RSS problems? Anyone that knows the answer will you kindly respond? Thanx!
I needed to thank you for this good read!! I absolutely enjoyed every bit of it. I have you saved as a favorite to check out new things you post…
Way cool! Some very valid points! I appreciate you penning this post and the rest of the website is really good.
I really love your website.. Excellent colors & theme. Did you build this site yourself? Please reply back as I’m attempting to create my very own site and would love to know where you got this from or what the theme is called. Appreciate it!
I like it when people get together and share opinions. Great website, keep it up.
Nice post. I learn something totally new and challenging on websites I stumbleupon everyday. It’s always exciting to read through articles from other writers and practice a little something from other websites.
Next time I read a blog, I hope that it won’t disappoint me as much as this one. I mean, I know it was my choice to read through, nonetheless I actually thought you’d have something helpful to talk about. All I hear is a bunch of whining about something that you could fix if you were not too busy searching for attention.
I was very happy to uncover this page. I wanted to thank you for your time just for this wonderful read!! I definitely enjoyed every little bit of it and i also have you saved as a favorite to check out new information in your site.
Excellent blog you have got here.. It’s hard to find high-quality writing like yours nowadays. I truly appreciate people like you! Take care!!
I’d like to thank you for the efforts you have put in penning this site. I really hope to view the same high-grade content from you in the future as well. In fact, your creative writing abilities has motivated me to get my own, personal blog now 😉
This site definitely has all of the info I needed concerning this subject and didn’t know who to ask.
The very next time I read a blog, Hopefully it won’t fail me as much as this particular one. After all, Yes, it was my choice to read through, however I truly thought you would have something helpful to say. All I hear is a bunch of crying about something you can fix if you were not too busy seeking attention.
Oh my goodness! Impressive article dude! Thank you, However I am going through difficulties with your RSS. I don’t know why I am unable to subscribe to it. Is there anybody else having identical RSS issues? Anyone that knows the solution will you kindly respond? Thanx!
I could not refrain from commenting. Exceptionally well written.
Having read this I believed it was really informative. I appreciate you spending some time and energy to put this article together. I once again find myself personally spending a lot of time both reading and commenting. But so what, it was still worth it.
Greetings! Very helpful advice in this particular article! It’s the little changes that make the biggest changes. Thanks a lot for sharing!
Your style is so unique in comparison to other folks I’ve read stuff from. Thanks for posting when you have the opportunity, Guess I’ll just bookmark this web site.
When I initially left a comment I appear to have clicked the -Notify me when new comments are added- checkbox and from now on whenever a comment is added I recieve 4 emails with the exact same comment. Is there a way you are able to remove me from that service? Thanks.
Great information. Lucky me I found your website by accident (stumbleupon). I have saved it for later!
I couldn’t refrain from commenting. Well written!
You’ve made some decent points there. I checked on the internet for more info about the issue and found most people will go along with your views on this site.
There’s certainly a lot to know about this subject. I love all of the points you made.
Everything is very open with a precise explanation of the challenges. It was truly informative. Your website is useful. Thank you for sharing.
I couldn’t resist commenting. Very well written!
Excellent post. I was checking constantly this blog and I’m impressed! Very helpful information particularly the last part 🙂 I care for such info much. I was seeking this certain info for a very long time. Thank you and good luck.
I really enjoy the article post.Really looking forward to read more. Much obliged.
Hey, thanks for the blog article.Much thanks again. Awesome.
constantly i used to read smaller posts which also clear their motive, and that is also happening with this paragraph which I am reading at this place.
usa pharmacy india: generic pills india best online international pharmacies india
I love looking through an article that will make people think. Also, thanks for permitting me to comment.
Having read this I thought it was really enlightening. I appreciate you taking the time and energy to put this content together. I once again find myself spending way too much time both reading and posting comments. But so what, it was still worth it!
Spot on with this write-up, I truly feel this web site needs far more attention. I’ll probably be returning to see more, thanks for the advice.
That is a very good tip particularly to those new to the blogosphere. Brief but very accurate info… Thank you for sharing this one. A must read article.
After going over a few of the blog posts on your website, I truly appreciate your way of blogging. I book marked it to my bookmark webpage list and will be checking back soon. Please check out my website as well and tell me your opinion.
Greetings! Very useful advice in this particular post! It is the little changes that produce the most significant changes. Thanks for sharing!
It’s difficult to find experienced people in this particular topic, however, you seem like you know what you’re talking about! Thanks
Greetings! Very helpful advice in this particular post! It is the little changes that make the largest changes. Many thanks for sharing!
Hey there! I simply wish to offer you a huge thumbs up for your excellent info you have right here on this post. I’ll be coming back to your site for more soon.
Way cool! Some extremely valid points! I appreciate you penning this article and the rest of the site is also very good.
Very good info. Lucky me I ran across your website by accident (stumbleupon). I’ve saved it for later.
A motivating discussion is definitely worth comment. I think that you ought to write more on this subject, it may not be a taboo subject but usually people don’t speak about these topics. To the next! Cheers.
This is a good tip especially to those new to the blogosphere. Brief but very precise information… Many thanks for sharing this one. A must read article.
That is a really good tip particularly to those new to the blogosphere. Brief but very precise information… Appreciate your sharing this one. A must read post.
Greetings! Very helpful advice within this article! It’s the little changes that make the greatest changes. Thanks for sharing!
An impressive share! I have just forwarded this onto a co-worker who was doing a little research on this. And he actually ordered me dinner due to the fact that I stumbled upon it for him… lol. So let me reword this…. Thank YOU for the meal!! But yeah, thanks for spending time to talk about this topic here on your web site.
Can I just say what a comfort to uncover someone that genuinely knows what they’re talking about over the internet. You definitely understand how to bring an issue to light and make it important. More and more people ought to read this and understand this side of the story. I can’t believe you are not more popular because you definitely have the gift.
I like it when folks get together and share opinions. Great website, keep it up.
Excellent article! We are linking to this great content on our website. Keep up the good writing.
You made some decent points there. I looked on the internet to learn more about the issue and found most people will go along with your views on this website.
I absolutely love your website.. Great colors & theme. Did you create this amazing site yourself? Please reply back as I’m looking to create my own personal blog and want to find out where you got this from or just what the theme is called. Cheers!
A fascinating discussion is worth comment. I think that you ought to write more on this subject, it might not be a taboo matter but usually folks don’t speak about such issues. To the next! Many thanks!
Howdy! I could have sworn I’ve visited this website before but after looking at many of the articles I realized it’s new to me. Nonetheless, I’m definitely happy I found it and I’ll be bookmarking it and checking back often!
bookmarked!!, I love your site.
Howdy! I just wish to give you a big thumbs up for your great information you’ve got right here on this post. I am returning to your web site for more soon.
Good day! I could have sworn I’ve visited this blog before but after going through a few of the posts I realized it’s new to me. Regardless, I’m certainly delighted I found it and I’ll be book-marking it and checking back frequently!
Spot on with this write-up, I honestly believe that this web site needs much more attention. I’ll probably be back again to read more, thanks for the info.
It’s really a great and helpful piece of information. I’m happy that you shared this helpful information with us. Please keep us informed like this. Thanks for sharing.
There is certainly a lot to learn about this topic. I really like all of the points you made.
I don’t even understand how I stopped up right here, however I believed this post was once good. I don’t understand who you’re however certainly you’re going to a well-known blogger for those who are not already 😉 Cheers!
magnificent issues altogether, you just won a logo new reader.What could you recommend in regards to your put up that you simply made some days ago?Any positive?
Great web site you’ve got here.. It’s hard to find good quality writing like yours nowadays. I truly appreciate individuals like you! Take care!!
I blog quite often and I really thank you for your information. This article has really peaked my interest. I will book mark your website and keep checking for new details about once per week. I opted in for your RSS feed too.
Hi, I do believe this is a great website. I stumbledupon it 😉 I’m going to return once again since i have book marked it. Money and freedom is the greatest way to change, may you be rich and continue to guide other people.
This site was… how do I say it? Relevant!! Finally I have found something which helped me. Many thanks.
This site really has all the info I wanted concerning this subject and didn’t know who to ask.
May I simply say what a relief to find someone that genuinely understands what they’re discussing online. You certainly realize how to bring an issue to light and make it important. A lot more people need to look at this and understand this side of the story. It’s surprising you are not more popular since you certainly possess the gift.
Greetings! Very helpful advice within this post! It is the little changes that produce the most important changes. Thanks for sharing!
I absolutely love your blog.. Pleasant colors & theme. Did you make this amazing site yourself? Please reply back as I’m hoping to create my very own blog and want to learn where you got this from or exactly what the theme is called. Many thanks!
It’s nearly impossible to find experienced people in this particular subject, however, you seem like you know what you’re talking about! Thanks
Good web site you have here.. It’s hard to find quality writing like yours nowadays. I seriously appreciate individuals like you! Take care!!
It’s hard to come by educated people on this topic, however, you seem like you know what you’re talking about! Thanks
I needed to thank you for this very good read!! I absolutely enjoyed every bit of it. I’ve got you bookmarked to look at new things you post…
Hi, There’s no doubt that your blog could possibly be having web browser compatibility problems. When I take a look at your blog in Safari, it looks fine however, if opening in Internet Explorer, it’s got some overlapping issues. I just wanted to provide you with a quick heads up! Other than that, excellent blog.
Hi, I do believe this is an excellent site. I stumbledupon it 😉 I may come back once again since I book-marked it. Money and freedom is the greatest way to change, may you be rich and continue to help other people.
Greetings, I believe your website could be having internet browser compatibility problems. When I look at your website in Safari, it looks fine but when opening in I.E., it’s got some overlapping issues. I simply wanted to give you a quick heads up! Besides that, great website.
Pretty! This has been a really wonderful post. Thank you for supplying this information.
I really like it whenever people get together and share views. Great blog, continue the good work!
Way cool! Some very valid points! I appreciate you writing this post plus the rest of the website is really good.
Can I simply say what a relief to discover somebody that truly understands what they are discussing on the web. You certainly know how to bring a problem to light and make it important. A lot more people have to read this and understand this side of your story. I can’t believe you are not more popular because you most certainly have the gift.
Spot on with this write-up, I actually believe that this web site needs a great deal more attention. I’ll probably be returning to read more, thanks for the information.
This is the perfect web site for anybody who hopes to understand this topic. You understand a whole lot its almost hard to argue with you (not that I actually will need to…HaHa). You definitely put a brand new spin on a subject which has been written about for a long time. Excellent stuff, just wonderful.
I’d like to thank you for the efforts you have put in penning this blog. I’m hoping to check out the same high-grade blog posts from you in the future as well. In fact, your creative writing abilities has inspired me to get my own site now 😉
I could not refrain from commenting. Exceptionally well written!
Hello, I believe your blog might be having web browser compatibility issues. Whenever I look at your blog in Safari, it looks fine however, when opening in Internet Explorer, it’s got some overlapping issues. I simply wanted to provide you with a quick heads up! Apart from that, great website.
Your style is really unique in comparison to other folks I’ve read stuff from. Thanks for posting when you’ve got the opportunity, Guess I’ll just book mark this page.
I’m amazed, I must say. Rarely do I encounter a blog that’s equally educative and amusing, and without a doubt, you’ve hit the nail on the head. The problem is something too few people are speaking intelligently about. Now i’m very happy I stumbled across this in my hunt for something regarding this.
I needed to thank you for this wonderful read!! I certainly loved every little bit of it. I’ve got you bookmarked to look at new stuff you post…
Spot on with this write-up, I absolutely believe that this site needs a lot more attention. I’ll probably be returning to read through more, thanks for the advice!
Greetings! Very useful advice within this post! It’s the little changes that produce the greatest changes. Thanks for sharing!
This is a topic which is near to my heart… Many thanks! Where are your contact details though?
Good information. Lucky me I discovered your blog by accident (stumbleupon). I’ve book marked it for later!
This website was… how do I say it? Relevant!! Finally I have found something which helped me. Cheers!
Everything is very open with a very clear explanation of the issues. It was truly informative. Your site is very useful. Thanks for sharing.
Good web site you have got here.. It’s difficult to find excellent writing like yours nowadays. I really appreciate people like you! Take care!!
This is a topic that’s close to my heart… Thank you! Where are your contact details though?
Saved as a favorite, I really like your site!
It’s nearly impossible to find experienced people about this subject, however, you sound like you know what you’re talking about! Thanks
Everything is very open with a precise clarification of the issues. It was really informative. Your website is very helpful. Thank you for sharing.
This page definitely has all of the information and facts I needed concerning this subject and didn’t know who to ask.
I could not resist commenting. Well written.
Excellent article. I’m going through some of these issues as well..
You’re so cool! I don’t suppose I’ve read through something like this before. So good to find somebody with some original thoughts on this issue. Really.. many thanks for starting this up. This website is something that is needed on the web, someone with some originality.
May I simply just say what a relief to uncover someone that genuinely knows what they’re discussing on the internet. You certainly realize how to bring a problem to light and make it important. A lot more people ought to check this out and understand this side of the story. I was surprised you’re not more popular given that you definitely have the gift.
Good write-up. I definitely love this website. Stick with it!
Next time I read a blog, I hope that it won’t disappoint me as much as this particular one. After all, I know it was my choice to read, however I genuinely believed you would probably have something helpful to talk about. All I hear is a bunch of crying about something you could fix if you were not too busy looking for attention.
Hi, I do believe this is a great site. I stumbledupon it 😉 I am going to revisit once again since I book marked it. Money and freedom is the best way to change, may you be rich and continue to guide others.
An interesting discussion is worth comment. I do think that you ought to write more on this issue, it might not be a taboo subject but usually people do not discuss such issues. To the next! Best wishes.
This blog was… how do you say it? Relevant!! Finally I have found something that helped me. Cheers.
I was more than happy to find this great site. I want to to thank you for ones time for this particularly wonderful read!! I definitely liked every little bit of it and I have you book-marked to look at new stuff in your website.
Saved as a favorite, I really like your blog.
This page definitely has all of the information and facts I needed concerning this subject and didn’t know who to ask.
I was able to find good advice from your blog posts.
Very good post. I absolutely appreciate this site. Keep it up!
This is a topic which is close to my heart… Many thanks! Where can I find the contact details for questions?
I blog often and I really appreciate your content. The article has really peaked my interest. I am going to take a note of your blog and keep checking for new details about once a week. I subscribed to your Feed as well.
Right here is the right web site for anybody who wishes to understand this topic. You know so much its almost tough to argue with you (not that I actually will need to…HaHa). You certainly put a fresh spin on a subject that’s been written about for many years. Great stuff, just excellent.
That is a very good tip especially to those new to the blogosphere. Short but very precise information… Many thanks for sharing this one. A must read article.
I love it when people come together and share opinions. Great site, continue the good work.
This is the right webpage for everyone who wishes to understand this topic. You know so much its almost hard to argue with you (not that I actually would want to…HaHa). You certainly put a fresh spin on a topic that has been written about for ages. Excellent stuff, just wonderful.
This blog was… how do you say it? Relevant!! Finally I have found something that helped me. Many thanks!
Great article! We will be linking to this great article on our website. Keep up the good writing.
This site was… how do you say it? Relevant!! Finally I have found something that helped me. Thanks.
This excellent website really has all the information and facts I wanted concerning this subject and didn’t know who to ask.
I blog frequently and I truly thank you for your information. The article has truly peaked my interest. I’m going to book mark your site and keep checking for new information about once a week. I opted in for your Feed as well.
Good information. Lucky me I discovered your site by accident (stumbleupon). I have book-marked it for later.
An interesting discussion is worth comment. I think that you ought to write more on this subject matter, it may not be a taboo subject but usually people don’t talk about these issues. To the next! Kind regards.
When I initially commented I seem to have clicked on the -Notify me when new comments are added- checkbox and from now on every time a comment is added I recieve four emails with the exact same comment. Perhaps there is an easy method you can remove me from that service? Thanks a lot.
I was more than happy to find this website. I need to to thank you for ones time for this particularly fantastic read!! I definitely loved every bit of it and i also have you saved to fav to see new things on your web site.
Aw, this was a very good post. Taking a few minutes and actual effort to generate a superb article… but what can I say… I put things off a whole lot and never seem to get anything done.
It is truly a nice and helpful piece of information. I am satisfied that you simply shared this helpful info with us. Please keep us informed like this. Thank you for sharing.
Your style is very unique in comparison to other folks I have read stuff from. I appreciate you for posting when you have the opportunity, Guess I will just book mark this blog.
Your style is very unique in comparison to other people I’ve read stuff from. Thanks for posting when you’ve got the opportunity, Guess I’ll just bookmark this web site.
I must thank you for the efforts you’ve put in writing this blog. I am hoping to check out the same high-grade content from you in the future as well. In fact, your creative writing abilities has encouraged me to get my own, personal blog now 😉
This blog was… how do I say it? Relevant!! Finally I have found something that helped me. Thanks a lot!
This excellent website definitely has all the info I needed about this subject and didn’t know who to ask.
Pretty! This was an extremely wonderful post. Many thanks for supplying this information.
Everything is very open with a clear description of the challenges. It was definitely informative. Your site is extremely helpful. Many thanks for sharing!
I couldn’t refrain from commenting. Perfectly written!
An impressive share! I’ve just forwarded this onto a co-worker who had been conducting a little homework on this. And he in fact ordered me breakfast simply because I stumbled upon it for him… lol. So allow me to reword this…. Thank YOU for the meal!! But yeah, thanks for spending time to talk about this matter here on your web page.
There is certainly a lot to find out about this subject. I like all the points you have made.
This site was… how do I say it? Relevant!! Finally I have found something which helped me. Cheers.
Aw, this was an exceptionally good post. Finding the time and actual effort to make a top notch article… but what can I say… I hesitate a whole lot and don’t seem to get nearly anything done.
After looking into a few of the articles on your web site, I seriously appreciate your technique of writing a blog. I saved it to my bookmark webpage list and will be checking back in the near future. Please check out my website too and let me know how you feel.
You are so awesome! I do not think I have read through something like that before. So good to find somebody with genuine thoughts on this subject matter. Seriously.. thanks for starting this up. This website is something that is needed on the internet, someone with a little originality.
Right here is the perfect site for everyone who wants to understand this topic. You realize a whole lot its almost tough to argue with you (not that I actually will need to…HaHa). You certainly put a new spin on a subject which has been discussed for decades. Wonderful stuff, just wonderful.
An interesting discussion is definitely worth comment. I do think that you should write more on this issue, it may not be a taboo matter but generally people do not discuss such subjects. To the next! Kind regards!
Everyone loves it whenever people get together and share thoughts. Great blog, continue the good work!
This website was… how do you say it? Relevant!! Finally I’ve found something which helped me. Thank you!
Very good info. Lucky me I recently found your blog by chance (stumbleupon). I have saved it for later!
Excellent post! We are linking to this great article on our website. Keep up the good writing.
This is the perfect blog for anyone who would like to find out about this topic. You understand so much its almost tough to argue with you (not that I really will need to…HaHa). You definitely put a new spin on a subject that has been written about for a long time. Excellent stuff, just wonderful.
Way cool! Some very valid points! I appreciate you writing this post plus the rest of the website is extremely good.
Excellent article! We are linking to this particularly great post on our website. Keep up the good writing.
You need to be a part of a contest for one of the finest websites online. I’m going to highly recommend this web site!
Everything is very open with a precise description of the issues. It was truly informative. Your site is very useful. Many thanks for sharing!
I’m impressed, I have to admit. Seldom do I encounter a blog that’s equally educative and engaging, and without a doubt, you have hit the nail on the head. The problem is an issue that not enough men and women are speaking intelligently about. I’m very happy that I found this in my hunt for something concerning this.
Aw, this was a very nice post. Spending some time and actual effort to produce a good article… but what can I say… I hesitate a whole lot and never manage to get anything done.
Hi! I could have sworn I’ve been to this site before but after looking at many of the articles I realized it’s new to me. Anyways, I’m certainly delighted I found it and I’ll be bookmarking it and checking back often!
There is certainly a great deal to find out about this subject. I like all the points you’ve made.
Greetings! Very helpful advice within this article! It’s the little changes that produce the biggest changes. Many thanks for sharing!
Everything is very open with a very clear explanation of the challenges. It was truly informative. Your website is very useful. Thank you for sharing.
Spot on with this write-up, I seriously believe this website needs a lot more attention. I’ll probably be back again to see more, thanks for the information!
Great information. Lucky me I discovered your website by chance (stumbleupon). I’ve saved it for later!
I was very pleased to discover this website. I want to to thank you for your time due to this wonderful read!! I definitely savored every bit of it and I have you book marked to see new things on your web site.
Saved as a favorite, I like your website!
Great information. Lucky me I found your blog by accident (stumbleupon). I’ve bookmarked it for later.
Excellent article! We will be linking to this great content on our site. Keep up the good writing.
I’d like to thank you for the efforts you’ve put in writing this blog. I am hoping to view the same high-grade content by you later on as well. In truth, your creative writing abilities has inspired me to get my very own blog now 😉
Right here is the perfect website for anyone who really wants to understand this topic. You understand a whole lot its almost tough to argue with you (not that I really would want to…HaHa). You definitely put a new spin on a subject that has been written about for a long time. Wonderful stuff, just excellent.
It’s difficult to find knowledgeable people on this topic, however, you sound like you know what you’re talking about! Thanks
Greetings! Very helpful advice within this post! It is the little changes that produce the biggest changes. Thanks a lot for sharing!
I quite like reading through an article that will make people think. Also, many thanks for allowing me to comment.
Next time I read a blog, Hopefully it doesn’t fail me as much as this particular one. I mean, Yes, it was my choice to read through, nonetheless I really thought you would probably have something interesting to say. All I hear is a bunch of moaning about something that you could fix if you were not too busy searching for attention.
Good post. I will be dealing with a few of these issues as well..
Way cool! Some very valid points! I appreciate you writing this article plus the rest of the site is also very good.
Right here is the perfect web site for anyone who really wants to find out about this topic. You realize so much its almost hard to argue with you (not that I actually will need to…HaHa). You certainly put a fresh spin on a topic which has been discussed for a long time. Great stuff, just excellent.
Next time I read a blog, Hopefully it doesn’t disappoint me as much as this particular one. After all, Yes, it was my choice to read through, however I genuinely thought you would probably have something useful to talk about. All I hear is a bunch of whining about something that you can fix if you weren’t too busy seeking attention.
Way cool! Some extremely valid points! I appreciate you writing this article plus the rest of the website is also really good.
A fascinating discussion is worth comment. I do think that you ought to write more about this topic, it might not be a taboo matter but usually people do not discuss these topics. To the next! Cheers!
This is a topic that’s near to my heart… Thank you! Exactly where are your contact details though?
This is a great tip especially to those fresh to the blogosphere. Short but very accurate information… Thanks for sharing this one. A must read article.
Enjoyed every bit of your blog post.Thanks Again. Really Great.
Major thanks for the article.Much thanks again. Want more.
I was very pleased to discover this site. I need to to thank you for your time just for this wonderful read!! I definitely liked every part of it and I have you saved to fav to check out new information on your website.
Everything is very open with a clear description of the issues. It was definitely informative. Your website is very useful. Thanks for sharing.
I blog often and I genuinely thank you for your information. This article has truly peaked my interest. I will take a note of your website and keep checking for new information about once a week. I subscribed to your Feed too.
I want to to thank you for this excellent read!! I certainly enjoyed every bit of it. I have you book-marked to look at new stuff you post…
I blog quite often and I truly thank you for your information. Your article has really peaked my interest. I will take a note of your website and keep checking for new details about once a week. I subscribed to your Feed as well.
Greetings! Very helpful advice in this particular post! It’s the little changes that produce the largest changes. Thanks a lot for sharing!
Hi there, I do believe your site could be having internet browser compatibility problems. When I look at your blog in Safari, it looks fine however, when opening in Internet Explorer, it’s got some overlapping issues. I simply wanted to give you a quick heads up! Besides that, wonderful blog.
Howdy! This post couldn’t be written any better! Reading through this article reminds me of my previous roommate! He continually kept preaching about this. I’ll forward this article to him. Pretty sure he’ll have a great read. Thank you for sharing!
Very good post. I certainly appreciate this website. Thanks!
This is a really good tip particularly to those new to the blogosphere. Short but very precise information… Many thanks for sharing this one. A must read article!
Having read this I believed it was extremely enlightening. I appreciate you taking the time and energy to put this article together. I once again find myself spending a lot of time both reading and commenting. But so what, it was still worth it.
Right here is the right website for everyone who would like to find out about this topic. You realize a whole lot its almost hard to argue with you (not that I actually will need to…HaHa). You certainly put a new spin on a subject which has been discussed for a long time. Wonderful stuff, just excellent.
Everything is very open with a clear clarification of the challenges. It was really informative. Your website is extremely helpful. Many thanks for sharing.
After checking out a handful of the articles on your site, I truly like your way of blogging. I saved as a favorite it to my bookmark webpage list and will be checking back soon. Please check out my web site as well and tell me how you feel.
Nice post. I learn something new and challenging on blogs I stumbleupon everyday. It’s always exciting to read articles from other writers and use something from other sites.
Everyone loves it when individuals get together and share views. Great site, keep it up.
Excellent article. I’m facing a few of these issues as well..
Next time I read a blog, Hopefully it does not disappoint me as much as this one. I mean, Yes, it was my choice to read, nonetheless I genuinely believed you’d have something helpful to talk about. All I hear is a bunch of complaining about something that you could possibly fix if you were not too busy looking for attention.
This site really has all of the info I needed about this subject and didn’t know who to ask.
Having read this I thought it was extremely informative. I appreciate you finding the time and energy to put this information together. I once again find myself spending way too much time both reading and posting comments. But so what, it was still worth it.
This blog was… how do you say it? Relevant!! Finally I have found something which helped me. Many thanks.
You ought to take part in a contest for one of the best websites on the net. I most certainly will recommend this blog!
Hi, I do believe this is a great site. I stumbledupon it 😉 I’m going to revisit once again since i have book marked it. Money and freedom is the greatest way to change, may you be rich and continue to help other people.
This site was… how do I say it? Relevant!! Finally I’ve found something that helped me. Kudos.
Hi there! I simply wish to give you a huge thumbs up for your great information you have got here on this post. I am returning to your site for more soon.
This is a topic which is near to my heart… Many thanks! Exactly where can I find the contact details for questions?
I must thank you for the efforts you’ve put in writing this site. I am hoping to see the same high-grade blog posts by you in the future as well. In fact, your creative writing abilities has encouraged me to get my own site now 😉
This site really has all of the info I needed concerning this subject and didn’t know who to ask.
It’s nearly impossible to find educated people on this subject, however, you sound like you know what you’re talking about! Thanks
Way cool! Some very valid points! I appreciate you penning this write-up and the rest of the website is really good.
You have made some good points there. I checked on the net to find out more about the issue and found most individuals will go along with your views on this website.
I seriously love your website.. Excellent colors & theme. Did you make this website yourself? Please reply back as I’m trying to create my very own site and want to learn where you got this from or exactly what the theme is called. Thanks!
I could not resist commenting. Very well written!
This website was… how do I say it? Relevant!! Finally I’ve found something that helped me. Appreciate it.
It’s difficult to find knowledgeable people about this topic, but you sound like you know what you’re talking about! Thanks
I need to to thank you for this wonderful read!! I definitely enjoyed every little bit of it. I have got you book-marked to look at new things you post…
I enjoy looking through an article that can make men and women think. Also, thank you for allowing for me to comment.
Right here is the right blog for everyone who wants to understand this topic. You know so much its almost tough to argue with you (not that I really would want to…HaHa). You definitely put a brand new spin on a subject that’s been written about for a long time. Excellent stuff, just excellent.
Great article. I will be going through some of these issues as well..
Way cool! Some extremely valid points! I appreciate you writing this post and also the rest of the site is very good.
Good post. I am experiencing a few of these issues as well..
I could not refrain from commenting. Well written.
Great information. Lucky me I came across your blog by accident (stumbleupon). I have bookmarked it for later.
There’s certainly a lot to learn about this issue. I love all of the points you made.
This site really has all the information and facts I wanted about this subject and didn’t know who to ask.
I blog often and I seriously appreciate your information. This great article has really peaked my interest. I am going to bookmark your site and keep checking for new information about once a week. I opted in for your Feed too.
There’s definately a great deal to find out about this issue. I really like all of the points you have made.
Very good post. I’m dealing with a few of these issues as well..
You have made some good points there. I checked on the web to find out more about the issue and found most individuals will go along with your views on this web site.
Wonderful article! We are linking to this great content on our website. Keep up the good writing.
Wonderful post! We are linking to this great post on our website. Keep up the great writing.
Hi there! I just wish to offer you a huge thumbs up for the excellent info you’ve got right here on this post. I will be returning to your blog for more soon.
This is a topic that is near to my heart… Best wishes! Where are your contact details though?
I need to to thank you for this wonderful read!! I certainly enjoyed every bit of it. I have got you book-marked to look at new stuff you post…
Spot on with this write-up, I honestly feel this website needs a lot more attention. I’ll probably be returning to read through more, thanks for the info.
I used to be able to find good advice from your content.
You made some decent points there. I checked on the web for more info about the issue and found most people will go along with your views on this web site.
Greetings! Very helpful advice within this post! It’s the little changes that make the largest changes. Many thanks for sharing!
Greetings! Very helpful advice in this particular post! It’s the little changes which will make the largest changes. Thanks for sharing!
Hi there! This post could not be written any better! Going through this article reminds me of my previous roommate! He continually kept talking about this. I most certainly will forward this post to him. Pretty sure he’ll have a very good read. I appreciate you for sharing!
Very good info. Lucky me I discovered your site by accident (stumbleupon). I’ve saved it for later!
It’s hard to come by well-informed people on this subject, but you seem like you know what you’re talking about! Thanks
There’s definately a lot to find out about this issue. I love all of the points you made.
I quite like looking through a post that will make men and women think. Also, thank you for allowing me to comment.
You should take part in a contest for one of the best sites on the net. I’m going to recommend this site!
I needed to thank you for this great read!! I certainly loved every bit of it. I have got you book-marked to look at new stuff you post…
I’m amazed, I must say. Seldom do I encounter a blog that’s both equally educative and interesting, and let me tell you, you have hit the nail on the head. The problem is something too few men and women are speaking intelligently about. I am very happy that I came across this during my search for something regarding this.
This page really has all the info I wanted concerning this subject and didn’t know who to ask.
It’s hard to come by knowledgeable people on this subject, however, you seem like you know what you’re talking about! Thanks
Your style is really unique compared to other people I have read stuff from. I appreciate you for posting when you have the opportunity, Guess I’ll just book mark this blog.
Very nice write-up. I certainly appreciate this website. Stick with it!
This site certainly has all the info I wanted concerning this subject and didn’t know who to ask.
I’d like to thank you for the efforts you’ve put in writing this site. I really hope to see the same high-grade blog posts by you later on as well. In truth, your creative writing abilities has inspired me to get my own site now 😉
You are so interesting! I don’t believe I have read anything like this before. So great to find someone with a few original thoughts on this issue. Really.. thanks for starting this up. This web site is one thing that’s needed on the web, someone with some originality.
This site was… how do I say it? Relevant!! Finally I’ve found something that helped me. Appreciate it.
Oh my goodness! Awesome article dude! Thank you so much, However I am having problems with your RSS. I don’t know why I cannot subscribe to it. Is there anybody else having the same RSS issues? Anybody who knows the solution can you kindly respond? Thanks!!
I would like to thank you for the efforts you’ve put in penning this site. I am hoping to check out the same high-grade content from you in the future as well. In fact, your creative writing abilities has motivated me to get my very own site now 😉
Howdy! This post could not be written much better! Looking through this article reminds me of my previous roommate! He always kept preaching about this. I will send this post to him. Pretty sure he’s going to have a great read. I appreciate you for sharing!
I like it whenever people get together and share thoughts. Great blog, stick with it!
You’ve made some good points there. I looked on the web for more information about the issue and found most people will go along with your views on this site.
The next time I read a blog, Hopefully it does not disappoint me as much as this particular one. I mean, I know it was my choice to read, however I really thought you would probably have something interesting to talk about. All I hear is a bunch of moaning about something that you could fix if you weren’t too busy searching for attention.
Hi, I do think this is a great site. I stumbledupon it 😉 I will come back once again since i have book-marked it. Money and freedom is the greatest way to change, may you be rich and continue to help others.
I seriously love your blog.. Great colors & theme. Did you make this site yourself? Please reply back as I’m looking to create my very own blog and would like to find out where you got this from or just what the theme is called. Cheers.
Pretty! This was an extremely wonderful post. Thank you for providing these details.
This is a topic which is near to my heart… Cheers! Where are your contact details though?
When I originally left a comment I seem to have clicked the -Notify me when new comments are added- checkbox and now every time a comment is added I receive four emails with the same comment. There has to be a way you can remove me from that service? Thanks a lot.
Wonderful article! We will be linking to this great article on our website. Keep up the great writing.
Nice post. I learn something new and challenging on sites I stumbleupon on a daily basis. It’s always exciting to read through content from other authors and practice a little something from their web sites.
This website really has all the information I wanted concerning this subject and didn’t know who to ask.
Very good article. I’m experiencing many of these issues as well..
That is a very good tip particularly to those new to the blogosphere. Brief but very precise info… Thanks for sharing this one. A must read article!
That is a good tip especially to those fresh to the blogosphere. Simple but very precise info… Many thanks for sharing this one. A must read article.
It’s hard to find well-informed people on this subject, however, you sound like you know what you’re talking about! Thanks
I needed to thank you for this fantastic read!! I absolutely loved every bit of it. I have you saved as a favorite to look at new stuff you post…
Aw, this was a really nice post. Finding the time and actual effort to create a good article… but what can I say… I put things off a lot and never manage to get nearly anything done.
I absolutely love your website.. Excellent colors & theme. Did you build this website yourself? Please reply back as I’m trying to create my own personal website and would love to know where you got this from or just what the theme is called. Many thanks.
I was very pleased to uncover this site. I wanted to thank you for your time for this fantastic read!! I definitely savored every little bit of it and i also have you bookmarked to see new information on your blog.
Wonderful post! We will be linking to this particularly great content on our site. Keep up the great writing.
It’s hard to come by knowledgeable people for this subject, but you sound like you know what you’re talking about! Thanks
I couldn’t resist commenting. Perfectly written!
You have made some decent points there. I checked on the net for additional information about the issue and found most people will go along with your views on this site.
Your style is unique in comparison to other folks I have read stuff from. I appreciate you for posting when you have the opportunity, Guess I will just book mark this web site.
I like looking through a post that will make people think. Also, many thanks for allowing for me to comment.
You’ve made some good points there. I looked on the web for additional information about the issue and found most individuals will go along with your views on this site.
This procedure ensures their legality and recognition.
Greetings! Very helpful advice in this particular post! It is the little changes that will make the most significant changes. Many thanks for sharing!
It’s nearly impossible to find experienced people for this subject, but you sound like you know what you’re talking about! Thanks
Having read this I believed it was really enlightening. I appreciate you spending some time and effort to put this information together. I once again find myself spending way too much time both reading and posting comments. But so what, it was still worthwhile!
Oh my goodness! Awesome article dude! Thanks, However I am going through issues with your RSS. I don’t understand why I am unable to join it. Is there anybody having the same RSS issues? Anyone who knows the answer will you kindly respond? Thanks!!
This is a topic that’s near to my heart… Cheers! Exactly where are your contact details though?
Right here is the perfect blog for everyone who hopes to understand this topic. You understand a whole lot its almost tough to argue with you (not that I really would want to…HaHa). You certainly put a brand new spin on a subject that’s been discussed for decades. Wonderful stuff, just excellent.
Hello there! This article could not be written much better! Going through this article reminds me of my previous roommate! He continually kept talking about this. I most certainly will forward this post to him. Fairly certain he’s going to have a very good read. Many thanks for sharing!
A big thank you for your article post.Really looking forward to read more. Keep writing.
Really appreciate you sharing this post. Keep writing.
Aw, this was an incredibly nice post. Taking the time and actual effort to create a superb article… but what can I say… I procrastinate a lot and don’t seem to get nearly anything done.
Great web site you have got here.. It’s difficult to find good quality writing like yours these days. I seriously appreciate people like you! Take care!!
Spot on with this write-up, I absolutely feel this site needs far more attention. I’ll probably be back again to read through more, thanks for the info!
Way cool! Some very valid points! I appreciate you penning this article and the rest of the site is also really good.
Having read this I believed it was really enlightening. I appreciate you taking the time and effort to put this article together. I once again find myself spending a lot of time both reading and posting comments. But so what, it was still worth it!
Way cool! Some extremely valid points! I appreciate you writing this article plus the rest of the website is extremely good.
Major thanks for the blog. Cool.
I love looking through an article that will make people think. Also, thank you for allowing for me to comment.
This website was… how do I say it? Relevant!! Finally I’ve found something that helped me. Kudos.
May I simply say what a relief to find a person that genuinely knows what they’re discussing on the internet. You certainly realize how to bring an issue to light and make it important. More and more people have to check this out and understand this side of your story. I was surprised you aren’t more popular since you most certainly possess the gift.
Very good post. I’m going through a few of these issues as well..
May I simply say what a relief to find somebody who genuinely understands what they’re discussing on the internet. You actually realize how to bring an issue to light and make it important. More people need to look at this and understand this side of your story. I was surprised you aren’t more popular given that you definitely have the gift.
Hi, I do think this is an excellent website. I stumbledupon it 😉 I am going to come back yet again since i have book-marked it. Money and freedom is the best way to change, may you be rich and continue to help others.
I’m amazed, I must say. Rarely do I come across a blog that’s both educative and engaging, and let me tell you, you have hit the nail on the head. The issue is an issue that too few men and women are speaking intelligently about. Now i’m very happy I stumbled across this during my search for something relating to this.
Pretty! This was an incredibly wonderful post. Thanks for providing these details.
Saved as a favorite, I really like your site!
Aw, this was a really nice post. Taking a few minutes and actual effort to produce a really good article… but what can I say… I put things off a whole lot and never seem to get nearly anything done.
Your style is really unique compared to other folks I’ve read stuff from. Many thanks for posting when you have the opportunity, Guess I will just book mark this site.
Nice post. I learn something new and challenging on blogs I stumbleupon on a daily basis. It’s always exciting to read through content from other writers and practice something from other web sites.
Excellent blog post. I certainly appreciate this site. Keep it up!
An outstanding share! I have just forwarded this onto a co-worker who was doing a little homework on this. And he in fact bought me breakfast simply because I found it for him… lol. So allow me to reword this…. Thanks for the meal!! But yeah, thanx for spending time to talk about this matter here on your blog.
Everything is very open with a clear description of the challenges. It was definitely informative. Your website is extremely helpful. Thank you for sharing!
I could not refrain from commenting. Perfectly written.
Hello! I simply wish to give you a big thumbs up for your excellent info you have got right here on this post. I’ll be returning to your web site for more soon.
Howdy! I simply wish to give you a big thumbs up for your great information you’ve got here on this post. I will be returning to your blog for more soon.
Excellent blog you have got here.. It’s difficult to find good quality writing like yours nowadays. I honestly appreciate people like you! Take care!!
I love reading through an article that can make people think. Also, many thanks for allowing me to comment.
I love it whenever people get together and share opinions. Great website, stick with it!
An interesting discussion is worth comment. I do think that you need to write more about this issue, it may not be a taboo subject but generally people don’t talk about such subjects. To the next! Kind regards.
This site really has all the info I wanted about this subject and didn’t know who to ask.
Can I simply just say what a relief to find an individual who genuinely knows what they are discussing over the internet. You definitely know how to bring a problem to light and make it important. More and more people must read this and understand this side of your story. It’s surprising you aren’t more popular given that you certainly possess the gift.
This blog was… how do you say it? Relevant!! Finally I have found something that helped me. Appreciate it!
I’m amazed, I have to admit. Seldom do I encounter a blog that’s both equally educative and interesting, and without a doubt, you’ve hit the nail on the head. The issue is something too few folks are speaking intelligently about. Now i’m very happy that I came across this during my search for something relating to this.
Hello, I do think your blog could possibly be having internet browser compatibility problems. Whenever I look at your website in Safari, it looks fine however, when opening in IE, it has some overlapping issues. I just wanted to provide you with a quick heads up! Besides that, wonderful website!
After checking out a handful of the articles on your site, I honestly like your technique of writing a blog. I added it to my bookmark website list and will be checking back soon. Take a look at my web site as well and tell me your opinion.
I wanted to thank you for this good read!! I absolutely loved every bit of it. I have you saved as a favorite to look at new stuff you post…
I blog quite often and I genuinely thank you for your information. This article has truly peaked my interest. I will take a note of your website and keep checking for new details about once per week. I subscribed to your Feed too.
Way cool! Some very valid points! I appreciate you penning this article plus the rest of the website is extremely good.
I’m impressed, I have to admit. Seldom do I encounter a blog that’s equally educative and interesting, and without a doubt, you have hit the nail on the head. The issue is something that not enough people are speaking intelligently about. I am very happy that I came across this in my hunt for something regarding this.
Spot on with this write-up, I honestly believe this amazing site needs a great deal more attention. I’ll probably be returning to read through more, thanks for the info.
This is the perfect site for everyone who wishes to find out about this topic. You know so much its almost hard to argue with you (not that I personally would want to…HaHa). You certainly put a fresh spin on a subject that’s been discussed for ages. Excellent stuff, just wonderful.
Excellent blog you have here.. It’s hard to find high quality writing like yours these days. I honestly appreciate individuals like you! Take care!!
After I initially left a comment I appear to have clicked on the -Notify me when new comments are added- checkbox and from now on each time a comment is added I recieve four emails with the exact same comment. Is there an easy method you can remove me from that service? Kudos.
Nice post. I learn something new and challenging on sites I stumbleupon on a daily basis. It will always be interesting to read articles from other writers and practice something from their web sites.
I’m amazed, I have to admit. Seldom do I encounter a blog that’s both educative and engaging, and without a doubt, you have hit the nail on the head. The problem is something which not enough people are speaking intelligently about. I’m very happy I stumbled across this during my search for something regarding this.
Good article. I am facing a few of these issues as well..
Oh my goodness! Awesome article dude! Thank you, However I am having issues with your RSS. I don’t understand the reason why I am unable to join it. Is there anyone else getting identical RSS issues? Anyone who knows the solution can you kindly respond? Thanx.
This site certainly has all of the information I wanted concerning this subject and didn’t know who to ask.
Your style is so unique in comparison to other folks I have read stuff from. Thank you for posting when you have the opportunity, Guess I will just book mark this site.
Saved as a favorite, I love your web site.
Wow, great article.Really thank you! Really Great.
Very good blog post. I absolutely love this site. Stick with it!
Very good information. Lucky me I came across your blog by chance (stumbleupon). I’ve book marked it for later!
I was able to find good information from your blog posts.
I’m amazed, I have to admit. Seldom do I come across a blog that’s both educative and entertaining, and without a doubt, you have hit the nail on the head. The issue is something that not enough people are speaking intelligently about. I’m very happy that I stumbled across this in my hunt for something regarding this.
Everything is very open with a really clear explanation of the challenges. It was truly informative. Your website is very helpful. Thanks for sharing.
Pretty! This has been an extremely wonderful post. Thanks for supplying these details.
I wanted to thank you for this excellent read!! I absolutely enjoyed every little bit of it. I’ve got you bookmarked to look at new things you post…
Oh my goodness! Amazing article dude! Many thanks, However I am experiencing difficulties with your RSS. I don’t know the reason why I can’t join it. Is there anybody else getting the same RSS problems? Anyone who knows the solution will you kindly respond? Thanx!!
Good day! I just wish to give you a big thumbs up for the excellent info you’ve got here on this post. I’ll be returning to your site for more soon.
Nice post. I learn something new and challenging on blogs I stumbleupon on a daily basis. It will always be useful to read through articles from other writers and use something from their web sites.
I love reading through a post that will make people think. Also, thank you for allowing for me to comment.
The next time I read a blog, I hope that it does not disappoint me as much as this particular one. I mean, I know it was my choice to read, but I really believed you’d have something helpful to talk about. All I hear is a bunch of crying about something that you could possibly fix if you were not too busy searching for attention.
Aw, this was an incredibly good post. Taking the time and actual effort to generate a superb article… but what can I say… I procrastinate a whole lot and never seem to get anything done.
Spot on with this write-up, I absolutely believe this site needs much more attention. I’ll probably be back again to read more, thanks for the advice.
Having read this I believed it was really enlightening. I appreciate you taking the time and effort to put this short article together. I once again find myself spending a significant amount of time both reading and leaving comments. But so what, it was still worth it.
Spot on with this write-up, I actually think this website needs a great deal more attention. I’ll probably be returning to read through more, thanks for the advice.
This web site certainly has all of the information I needed concerning this subject and didn’t know who to ask.
You need to be a part of a contest for one of the greatest blogs on the web. I will recommend this web site!
I was able to find good advice from your content.
I’m more than happy to discover this web site. I want to to thank you for your time for this particularly fantastic read!! I definitely loved every bit of it and i also have you book marked to look at new information in your website.
I blog quite often and I genuinely appreciate your content. This article has really peaked my interest. I’m going to book mark your website and keep checking for new details about once a week. I opted in for your RSS feed as well.
Great info. Lucky me I found your site by accident (stumbleupon). I’ve saved as a favorite for later.
You have made some decent points there. I looked on the internet to find out more about the issue and found most individuals will go along with your views on this website.
Howdy, I do believe your blog might be having web browser compatibility issues. When I take a look at your website in Safari, it looks fine however when opening in Internet Explorer, it’s got some overlapping issues. I simply wanted to give you a quick heads up! Apart from that, wonderful blog.
I was able to find good advice from your blog posts.
After looking at a number of the blog articles on your site, I honestly appreciate your technique of writing a blog. I saved as a favorite it to my bookmark website list and will be checking back soon. Please check out my web site too and tell me your opinion.
Good blog you’ve got here.. It’s hard to find high quality writing like yours these days. I really appreciate people like you! Take care!!
This is a topic which is near to my heart… Many thanks! Exactly where are your contact details though?
Hi there! I simply wish to offer you a big thumbs up for your great information you have here on this post. I am returning to your blog for more soon.
Everything is very open with a very clear description of the issues. It was truly informative. Your site is very useful. Thanks for sharing.
May I simply just say what a relief to discover a person that genuinely understands what they are discussing online. You definitely know how to bring a problem to light and make it important. More people must check this out and understand this side of your story. I was surprised that you are not more popular given that you most certainly have the gift.
Everyone loves it when individuals get together and share thoughts. Great blog, stick with it.
After checking out a few of the articles on your web site, I really like your way of writing a blog. I book-marked it to my bookmark site list and will be checking back in the near future. Please check out my web site too and tell me your opinion.
I want to to thank you for this very good read!! I absolutely loved every little bit of it. I have you book-marked to look at new stuff you post…
The very next time I read a blog, I hope that it doesn’t disappoint me as much as this one. After all, I know it was my choice to read, nonetheless I truly thought you’d have something useful to talk about. All I hear is a bunch of whining about something you could possibly fix if you were not too busy looking for attention.
Hello, I think your blog may be having internet browser compatibility problems. Whenever I take a look at your site in Safari, it looks fine but when opening in I.E., it’s got some overlapping issues. I merely wanted to provide you with a quick heads up! Other than that, wonderful blog!
I’m impressed, I must say. Rarely do I come across a blog that’s both equally educative and engaging, and let me tell you, you have hit the nail on the head. The problem is an issue that not enough folks are speaking intelligently about. I am very happy that I found this in my hunt for something regarding this.
Hi there! I could have sworn I’ve been to this site before but after going through many of the articles I realized it’s new to me. Nonetheless, I’m definitely delighted I came across it and I’ll be book-marking it and checking back often.
Hi there, I think your web site could be having browser compatibility problems. When I take a look at your blog in Safari, it looks fine however when opening in IE, it has some overlapping issues. I merely wanted to provide you with a quick heads up! Aside from that, wonderful site.
Very good post! We will be linking to this particularly great post on our site. Keep up the great writing.
Spot on with this write-up, I truly feel this web site needs a lot more attention. I’ll probably be back again to read more, thanks for the advice.
I want to to thank you for this great read!! I absolutely loved every bit of it. I’ve got you book marked to look at new stuff you post…
Pretty! This was an extremely wonderful post. Thanks for supplying these details.
There is definately a lot to find out about this topic. I really like all of the points you made.
Hi there, I believe your website could possibly be having web browser compatibility problems. When I take a look at your web site in Safari, it looks fine however, when opening in IE, it’s got some overlapping issues. I merely wanted to provide you with a quick heads up! Apart from that, great blog!
It’s hard to find knowledgeable people on this subject, but you seem like you know what you’re talking about! Thanks
You ought to take part in a contest for one of the most useful websites online. I will highly recommend this web site!
I couldn’t refrain from commenting. Exceptionally well written.
I could not resist commenting. Perfectly written.
There is definately a lot to know about this subject. I love all the points you’ve made.
Having read this I thought it was extremely informative. I appreciate you finding the time and energy to put this information together. I once again find myself spending a lot of time both reading and commenting. But so what, it was still worthwhile!
When I originally left a comment I appear to have clicked on the -Notify me when new comments are added- checkbox and from now on every time a comment is added I get four emails with the same comment. Perhaps there is a way you can remove me from that service? Appreciate it.
I wanted to thank you for this wonderful read!! I certainly loved every little bit of it. I’ve got you bookmarked to look at new stuff you post…
Everything is very open with a precise explanation of the issues. It was really informative. Your site is useful. Many thanks for sharing.
May I simply say what a relief to find an individual who really understands what they are discussing on the internet. You certainly understand how to bring an issue to light and make it important. More and more people need to check this out and understand this side of the story. I can’t believe you are not more popular given that you surely possess the gift.
Hello there! I could have sworn I’ve been to this web site before but after going through a few of the posts I realized it’s new to me. Nonetheless, I’m definitely delighted I came across it and I’ll be bookmarking it and checking back regularly!
Having read this I thought it was extremely enlightening. I appreciate you finding the time and energy to put this information together. I once again find myself personally spending a lot of time both reading and commenting. But so what, it was still worth it!
I blog often and I genuinely appreciate your information. The article has truly peaked my interest. I will bookmark your website and keep checking for new information about once a week. I opted in for your Feed as well.
I like reading through an article that will make people think. Also, thanks for permitting me to comment.
I blog quite often and I genuinely appreciate your content. Your article has truly peaked my interest. I am going to bookmark your site and keep checking for new details about once per week. I opted in for your Feed as well.
Hi, I do believe this is a great web site. I stumbledupon it 😉 I will return yet again since I book marked it. Money and freedom is the best way to change, may you be rich and continue to help other people.
You’ve made some really good points there. I looked on the net for more info about the issue and found most people will go along with your views on this web site.
I truly love your website.. Very nice colors & theme. Did you make this website yourself? Please reply back as I’m wanting to create my very own site and would love to find out where you got this from or just what the theme is named. Appreciate it.
Way cool! Some extremely valid points! I appreciate you writing this post and also the rest of the website is also very good.
This website was… how do I say it? Relevant!! Finally I have found something which helped me. Cheers!
Aw, this was a very good post. Taking the time and actual effort to make a very good article… but what can I say… I procrastinate a lot and never seem to get anything done.
Oh my goodness! Amazing article dude! Many thanks, However I am encountering issues with your RSS. I don’t understand the reason why I can’t subscribe to it. Is there anyone else getting identical RSS problems? Anyone who knows the answer can you kindly respond? Thanx!
There’s certainly a great deal to find out about this topic. I love all of the points you made.
Hello there! I could have sworn I’ve been to your blog before but after browsing through a few of the posts I realized it’s new to me. Anyhow, I’m definitely pleased I came across it and I’ll be bookmarking it and checking back regularly.
I really like it whenever people get together and share thoughts. Great website, stick with it.
Can I simply say what a relief to uncover an individual who really understands what they are talking about over the internet. You definitely know how to bring an issue to light and make it important. A lot more people must look at this and understand this side of your story. It’s surprising you are not more popular since you certainly possess the gift.
Good blog you have got here.. It’s difficult to find good quality writing like yours nowadays. I seriously appreciate people like you! Take care!!
You are so awesome! I do not believe I’ve truly read something like this before. So nice to find somebody with a few unique thoughts on this issue. Seriously.. thank you for starting this up. This website is one thing that is needed on the web, someone with a little originality.
There is certainly a great deal to know about this subject. I love all the points you have made.
Very good article. I am going through some of these issues as well..
bookmarked!!, I like your web site!
I blog quite often and I really appreciate your information. Your article has really peaked my interest. I will bookmark your site and keep checking for new details about once per week. I subscribed to your Feed too.
Everything is very open with a very clear explanation of the challenges. It was truly informative. Your site is useful. Many thanks for sharing.
thanks
The next time I read a blog, Hopefully it doesn’t disappoint me just as much as this one. After all, Yes, it was my choice to read through, nonetheless I truly thought you would have something interesting to talk about. All I hear is a bunch of crying about something you could fix if you weren’t too busy searching for attention.
Hi there! This article could not be written much better! Reading through this post reminds me of my previous roommate! He always kept preaching about this. I’ll send this post to him. Fairly certain he’s going to have a great read. I appreciate you for sharing!
Hi, I do believe this is a great website. I stumbledupon it 😉 I may return yet again since i have saved as a favorite it. Money and freedom is the best way to change, may you be rich and continue to guide other people.
A fascinating discussion is worth comment. I do think that you should write more about this subject matter, it might not be a taboo matter but usually people don’t discuss such issues. To the next! Best wishes!
I like reading through an article that will make men and women think. Also, thank you for permitting me to comment.
Howdy! I just would like to offer you a huge thumbs up for the excellent information you’ve got right here on this post. I’ll be returning to your site for more soon.
You’ve made some really good points there. I looked on the internet to find out more about the issue and found most individuals will go along with your views on this website.
A fascinating discussion is definitely worth comment. I think that you need to publish more about this issue, it may not be a taboo subject but generally folks don’t talk about such subjects. To the next! Best wishes.
I couldn’t refrain from commenting. Exceptionally well written!
I used to be able to find good info from your content.
Way cool! Some very valid points! I appreciate you penning this post and the rest of the site is really good.
Having read this I believed it was really informative. I appreciate you taking the time and energy to put this content together. I once again find myself spending a lot of time both reading and leaving comments. But so what, it was still worthwhile!
This is a topic that is close to my heart… Take care! Exactly where are your contact details though?
Hi, I do believe this is an excellent blog. I stumbledupon it 😉 I am going to revisit yet again since I book marked it. Money and freedom is the greatest way to change, may you be rich and continue to guide others.
Pretty! This was an extremely wonderful article. Many thanks for providing this info.
You’re so interesting! I don’t suppose I’ve truly read through a single thing like this before. So good to discover another person with unique thoughts on this subject matter. Really.. thanks for starting this up. This site is one thing that is needed on the web, someone with some originality.
An outstanding share! I’ve just forwarded this onto a colleague who was doing a little homework on this. And he in fact bought me lunch because I discovered it for him… lol. So let me reword this…. Thank YOU for the meal!! But yeah, thanks for spending time to discuss this subject here on your web page.
I like it when people come together and share opinions. Great blog, keep it up.
Spot on with this write-up, I seriously believe that this site needs a great deal more attention. I’ll probably be returning to read through more, thanks for the information!
Great article! We will be linking to this particularly great article on our website. Keep up the good writing.
Very good post. I definitely love this site. Continue the good work!
I really like looking through a post that will make men and women think. Also, thank you for allowing me to comment.
Hi, I do think this is an excellent website. I stumbledupon it 😉 I am going to come back yet again since i have bookmarked it. Money and freedom is the best way to change, may you be rich and continue to help other people.
Good post. I learn something new and challenging on sites I stumbleupon everyday. It will always be interesting to read through articles from other authors and practice a little something from other sites.
bookmarked!!, I like your blog!
This blog was… how do you say it? Relevant!! Finally I have found something that helped me. Appreciate it.
I blog frequently and I genuinely appreciate your content. Your article has really peaked my interest. I will bookmark your blog and keep checking for new details about once per week. I opted in for your RSS feed too.
Excellent article! We will be linking to this particularly great content on our site. Keep up the good writing.
Hi there! This article couldn’t be written much better! Looking at this article reminds me of my previous roommate! He constantly kept preaching about this. I’ll forward this post to him. Pretty sure he’ll have a very good read. Thanks for sharing!
Nice post. I learn something totally new and challenging on websites I stumbleupon every day. It’s always useful to read content from other writers and practice a little something from other websites.
Very good write-up. I absolutely love this site. Stick with it!
Oh my goodness! Impressive article dude! Thanks, However I am having problems with your RSS. I don’t understand the reason why I am unable to subscribe to it. Is there anybody having the same RSS issues? Anybody who knows the answer will you kindly respond? Thanks!!
That is a very good tip especially to those fresh to the blogosphere. Brief but very accurate info… Thank you for sharing this one. A must read article.
There is definately a great deal to learn about this subject. I love all the points you’ve made.
Aw, this was an incredibly good post. Finding the time and actual effort to produce a really good article… but what can I say… I procrastinate a whole lot and don’t manage to get anything done.
Good post. I learn something totally new and challenging on websites I stumbleupon everyday. It will always be interesting to read through content from other writers and use a little something from their websites.
Everything is very open with a clear explanation of the challenges. It was definitely informative. Your website is very useful. Thanks for sharing!
This is the perfect blog for everyone who would like to understand this topic. You know a whole lot its almost hard to argue with you (not that I actually will need to…HaHa). You definitely put a new spin on a topic which has been written about for a long time. Great stuff, just great.
Good post. I learn something totally new and challenging on sites I stumbleupon every day. It will always be exciting to read articles from other authors and practice a little something from their websites.
Good day! I could have sworn I’ve visited this site before but after going through some of the articles I realized it’s new to me. Regardless, I’m definitely pleased I discovered it and I’ll be book-marking it and checking back regularly!
When I initially left a comment I appear to have clicked the -Notify me when new comments are added- checkbox and now each time a comment is added I receive four emails with the exact same comment. Is there a way you are able to remove me from that service? Thank you.
Right here is the perfect website for anyone who would like to find out about this topic. You understand so much its almost hard to argue with you (not that I personally would want to…HaHa). You definitely put a fresh spin on a topic which has been discussed for ages. Wonderful stuff, just excellent.
You are so cool! I don’t believe I’ve truly read anything like that before. So good to find somebody with some genuine thoughts on this issue. Really.. thanks for starting this up. This site is one thing that’s needed on the internet, someone with a bit of originality.
Hi, I do believe this is an excellent web site. I stumbledupon it 😉 I will return yet again since I saved as a favorite it. Money and freedom is the best way to change, may you be rich and continue to guide other people.
Everything is very open with a really clear clarification of the issues. It was really informative. Your website is very useful. Thanks for sharing.
I like it when folks get together and share opinions. Great blog, continue the good work!
This page truly has all of the information and facts I wanted about this subject and didn’t know who to ask.
An impressive share! I’ve just forwarded this onto a friend who was conducting a little research on this. And he in fact bought me lunch due to the fact that I stumbled upon it for him… lol. So allow me to reword this…. Thanks for the meal!! But yeah, thanx for spending some time to talk about this topic here on your site.
I like it when folks come together and share opinions. Great blog, keep it up!
You appear to know a lot about this.
That is a really good tip especially to those new to the blogosphere. Simple but very accurate info… Thanks for sharing this one. A must read article.
This excellent website really has all the information and facts I wanted about this subject and didn’t know who to ask.
Howdy, I believe your web site may be having internet browser compatibility problems. Whenever I look at your website in Safari, it looks fine but when opening in I.E., it’s got some overlapping issues. I just wanted to give you a quick heads up! Aside from that, excellent blog.
Very nice write-up. I absolutely love this site. Continue the good work!
You are so interesting! I do not believe I’ve read something like that before. So nice to discover someone with genuine thoughts on this subject matter. Really.. many thanks for starting this up. This web site is one thing that is required on the web, someone with some originality.
After I initially commented I seem to have clicked on the -Notify me when new comments are added- checkbox and now each time a comment is added I get four emails with the same comment. Is there an easy method you are able to remove me from that service? Thank you.